


Tracking who’s on vacation across a team is harder than it should be in Outlook and Teams. This guide covers how to add vacation to your Outlook calendar in 6 steps, how to set up a shared team vacation calendar in Microsoft Teams, and how to manage absences at scale with Virto Calendar App.
Quick Answer: How to Add Vacation to Outlook Calendar (6 Steps)
How to Add Vacation to Outlook Calendar (6 Steps):
- Open Outlook Calendar and click “New Event” (New Outlook / OWA) or “New Appointment” (Classic Desktop).
- Enter a title, e.g. “Vacation”, “Annual Leave”, or “PTO”.
- Check “All day” and set the start and end dates.
- In the “Show As” dropdown, select “Out of Office” (not “Busy”) so colleagues see you’re away, not just occupied.
- Optionally add notes: emergency contact, delegate name.
- Click “Save” (OWA) or “Save & Close” (Desktop).
To also send automatic email replies during your vacation, go to Settings → Mail → Automatic replies (OWA) or File → Automatic Replies (Desktop). The calendar block and the auto-reply are separate features.
How to Add Vacation to Outlook Calendar
Outlook has several clients — New Outlook, the Classic Desktop app, Outlook on the web (OWA), and the mobile apps — and the UI differs across them. The 6-step flow above works everywhere; the screenshots below show what each interface looks like in 2026.
New Outlook (Windows and Mac)
- Open Outlook and switch to Calendar from the left rail.
- Click “New event” in the top-left corner.
- Type a title (Vacation / Annual Leave / PTO), toggle “All day”, and pick your start and end dates.
- Open the “Show as” dropdown and choose “Out of office”.
- Add an optional note (delegate, backup contact) and click “Save”.
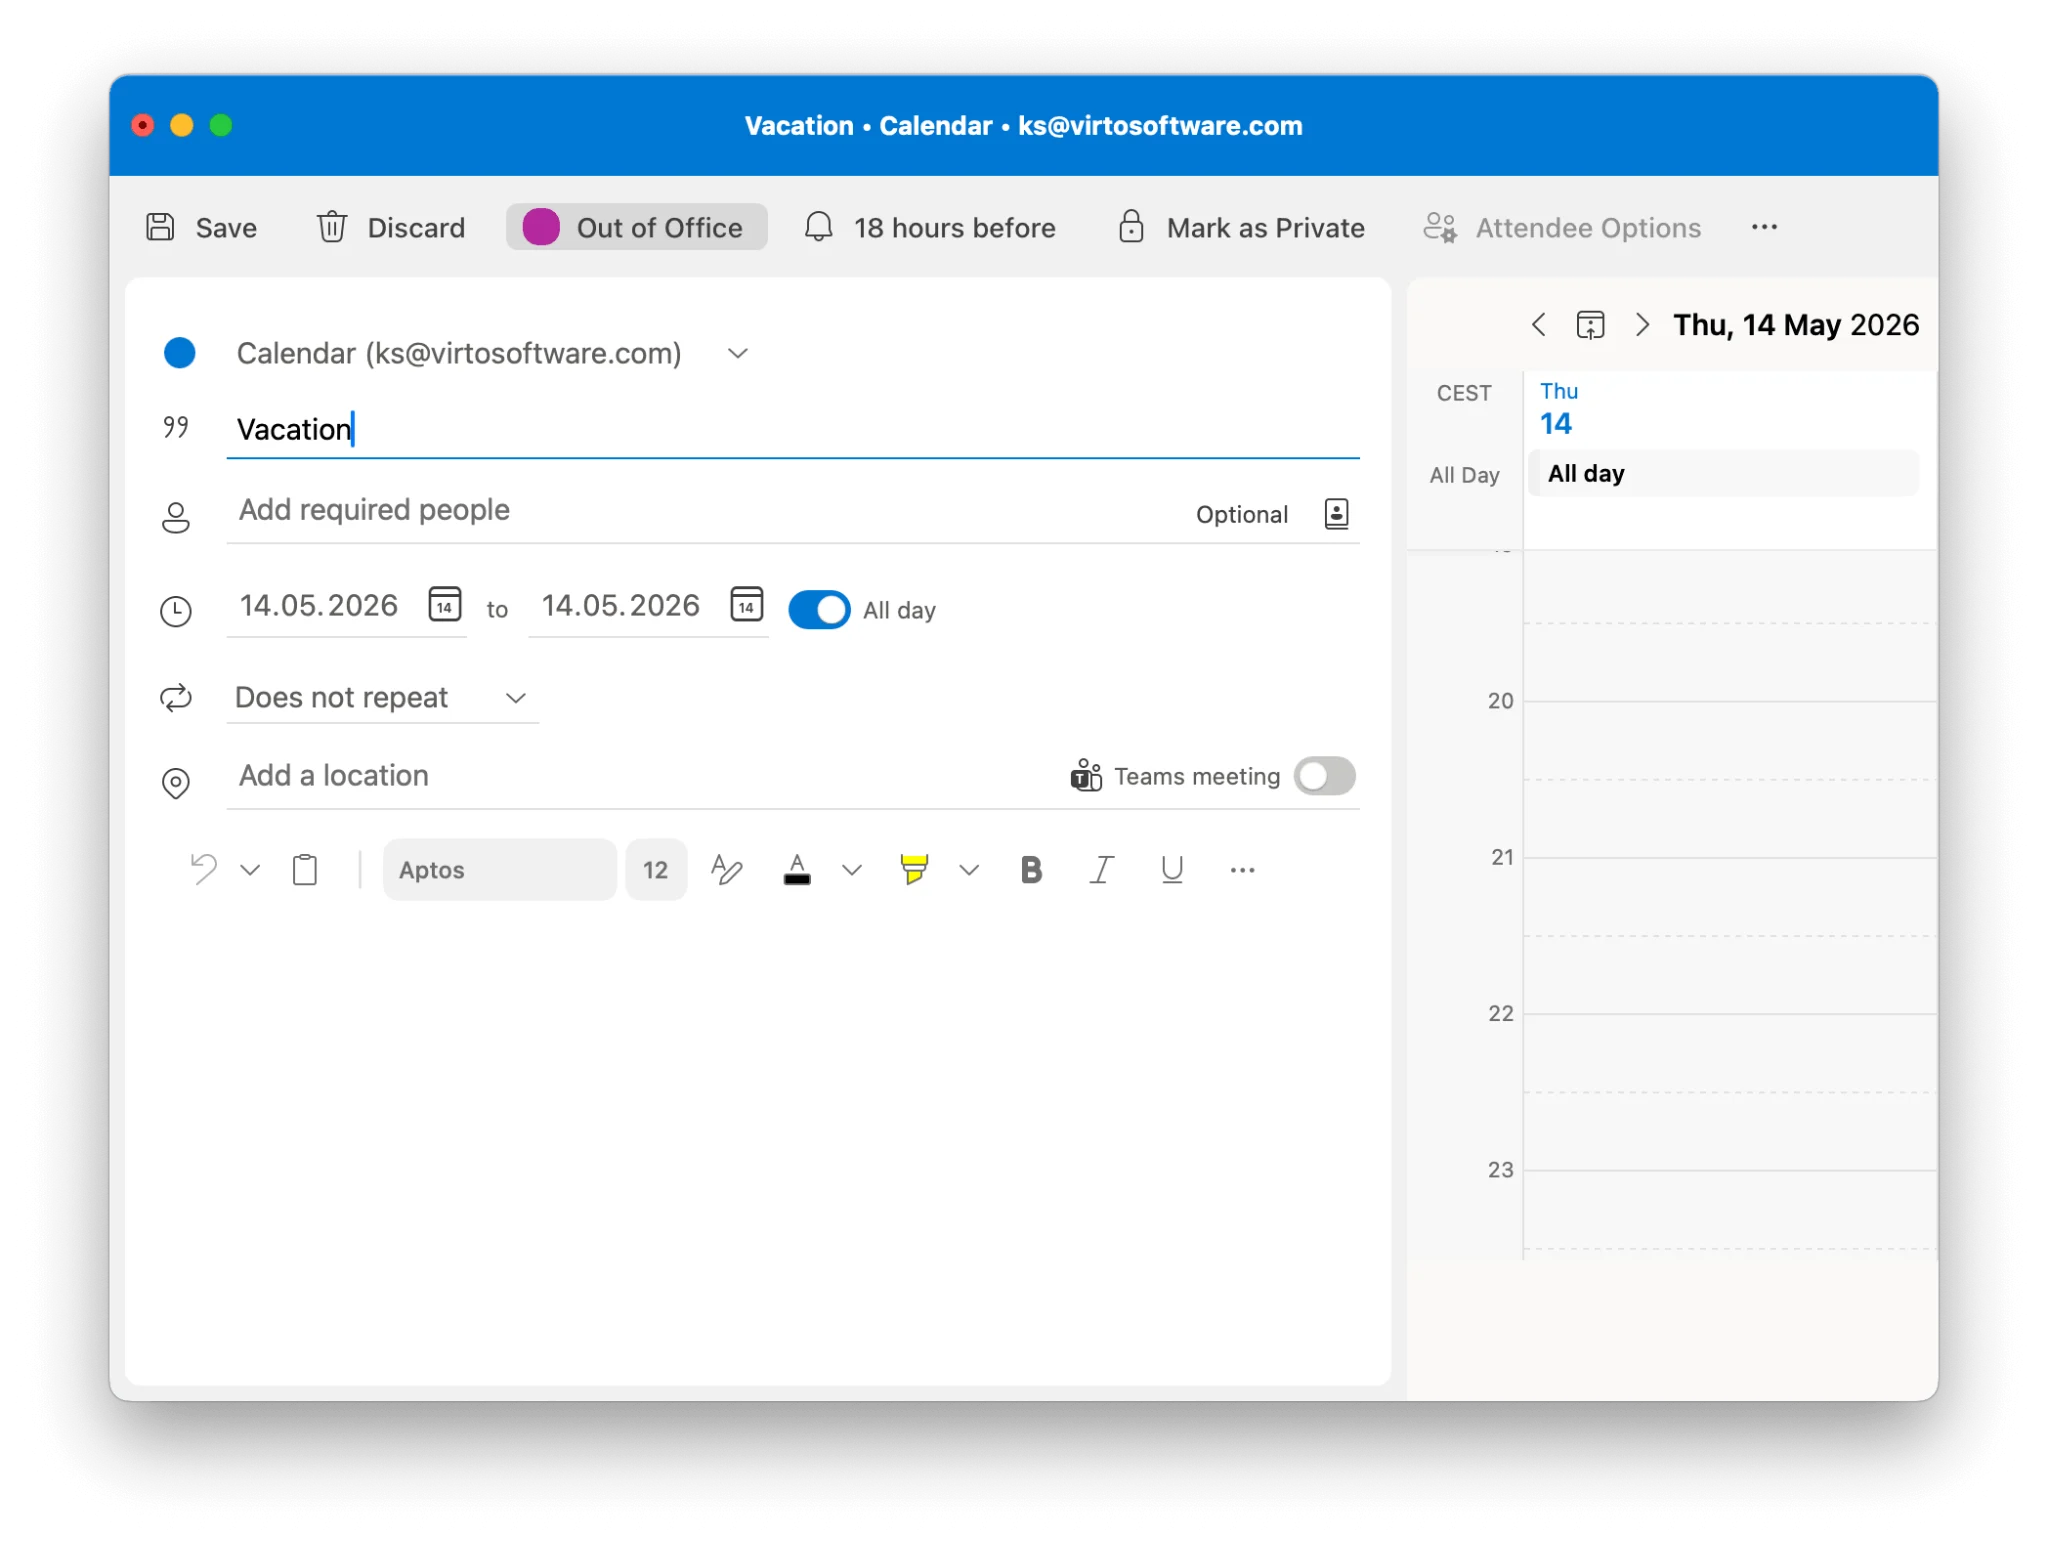
New Outlook — Event creation panel
Classic Outlook Desktop
- In the Calendar view, click Home → New Appointment (or press Ctrl + N).
- Enter a subject, set the start and end dates, and tick the “All day event” checkbox.
- On the ribbon, set “Show As” to “Out of Office”.
- Click “Save & Close”.
Outlook on the Web (OWA)
- Go to outlook.office.com and open Calendar.
- Click “New event” → fill in title, dates, and check “All day”.
- Set “Show as: Out of office”, then click “Save”.

Outlook on the Web — Save dialog
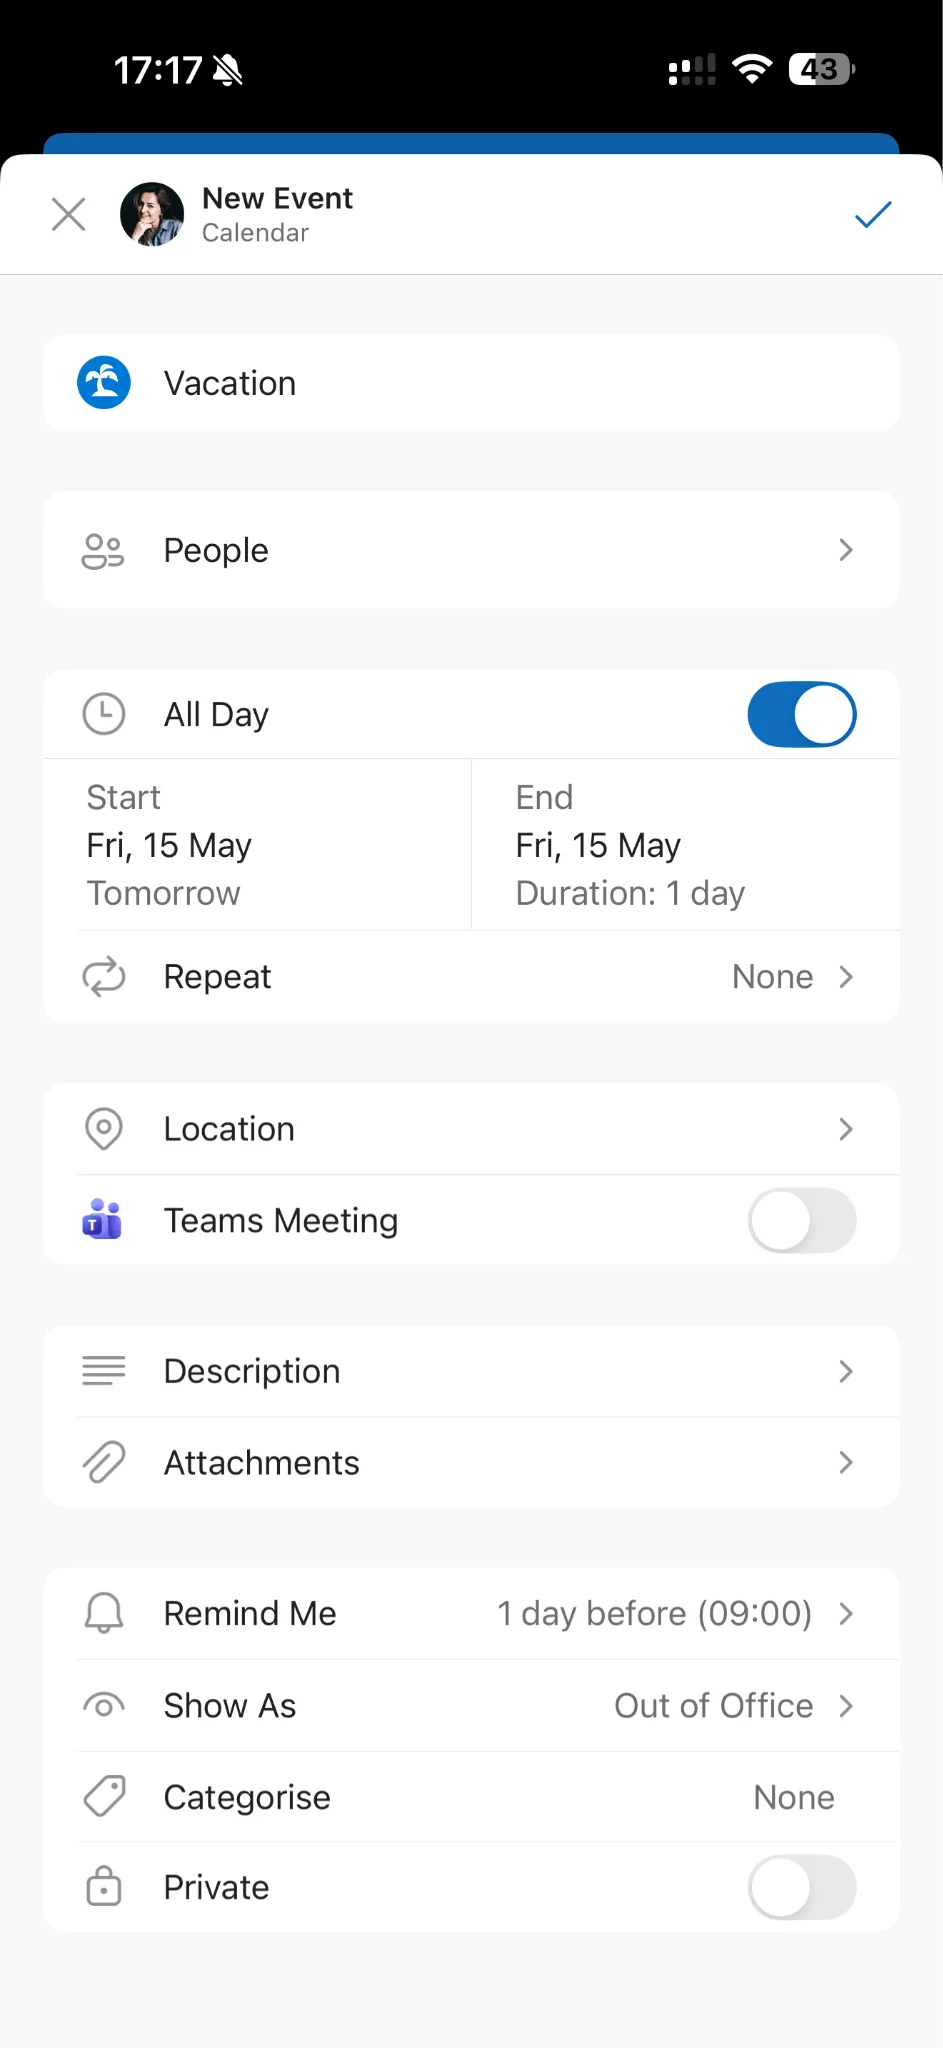
Outlook Mobile (iOS & Android)
- Tap the Calendar icon in the bottom bar.
- Tap the "+" floating button to create an event.
- Title it “Vacation”, toggle “All day”, and pick the dates.
- Tap “Show as” → “Out of office” → “Save”.
How to Add Time Off and PTO to Outlook Calendar
People often use “PTO” and “Out of Office” interchangeably, but in Outlook they refer to two different things:
- A PTO event is a calendar block — it makes you appear busy in Scheduling Assistant and shows the time on shared calendars.
- An OOO (Out of Office) status is the mail-side auto-reply — it sends a message to anyone who emails you while you’re away.
For full coverage, set up both. The 6-step Quick Answer above creates the PTO event. To configure auto-replies:
- In New Outlook / OWA: Settings → Mail → Automatic replies. Toggle on, set start and end times, and write a short message that names a backup contact.
- In Classic Desktop: File → Automatic Replies. Use separate messages for internal and external senders if needed.
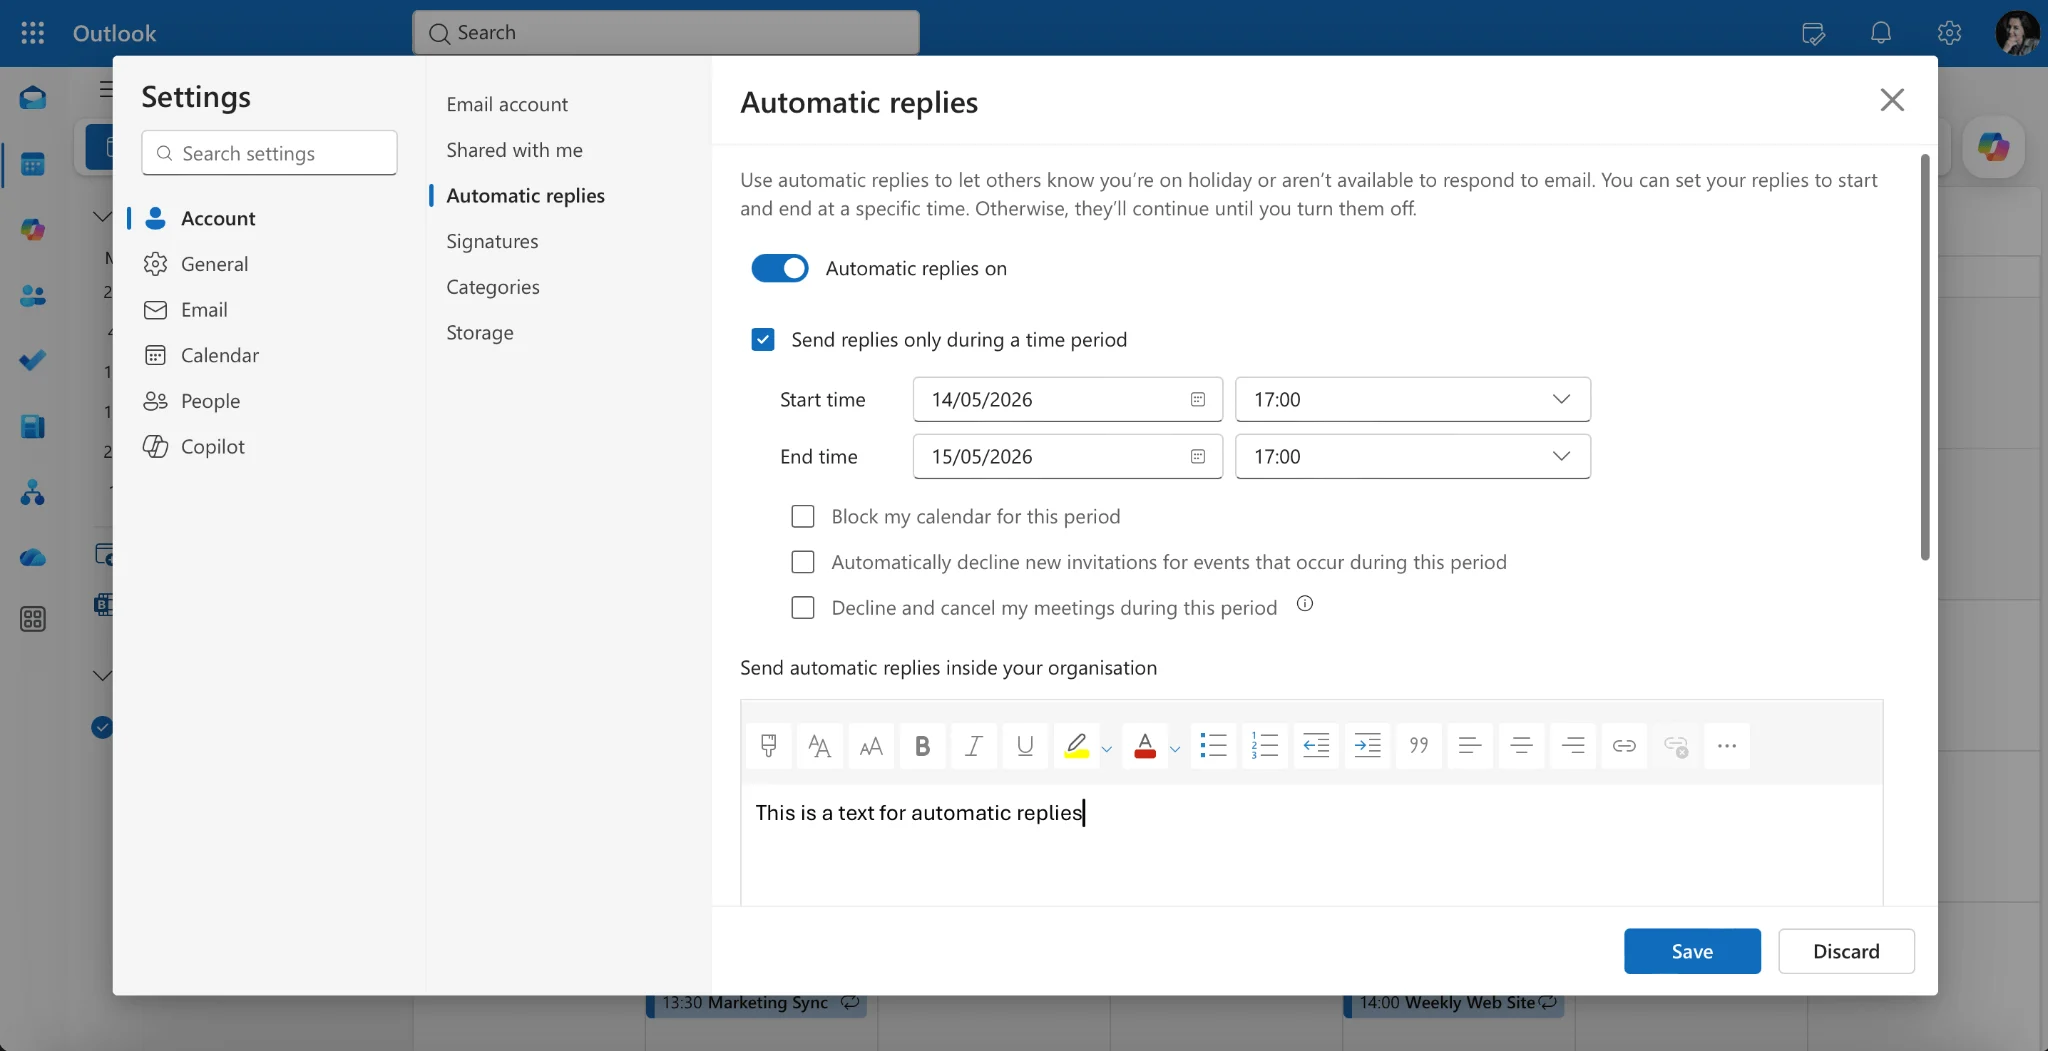
Automatic Replies (Out of Office) dialog
If your organization tracks PTO in a shared calendar, also add the event there so managers can see team availability at a glance. For a deeper walk-through, see our guide to setting Out of Office in Outlook.
How to Create a Shared Vacation Calendar in Outlook
A shared vacation calendar gives your whole team one place to see who’s off and when. Here’s the cleanest way to set one up in Outlook today.
- Open Outlook → Calendar. In the left rail, right-click “My Calendars” → “Add calendar” → “Create blank calendar”.
- Name it “Team Vacation Calendar” and place it in a folder accessible to the whole group.
- Right-click the new calendar → “Sharing and permissions”. Add your teammates.
- Set permission level. For most teams “Can view all details” works well — pick “Can view when I’m busy” if you need more privacy.
- Click “Share”. Each member receives an email invite to add the calendar to their own Outlook.
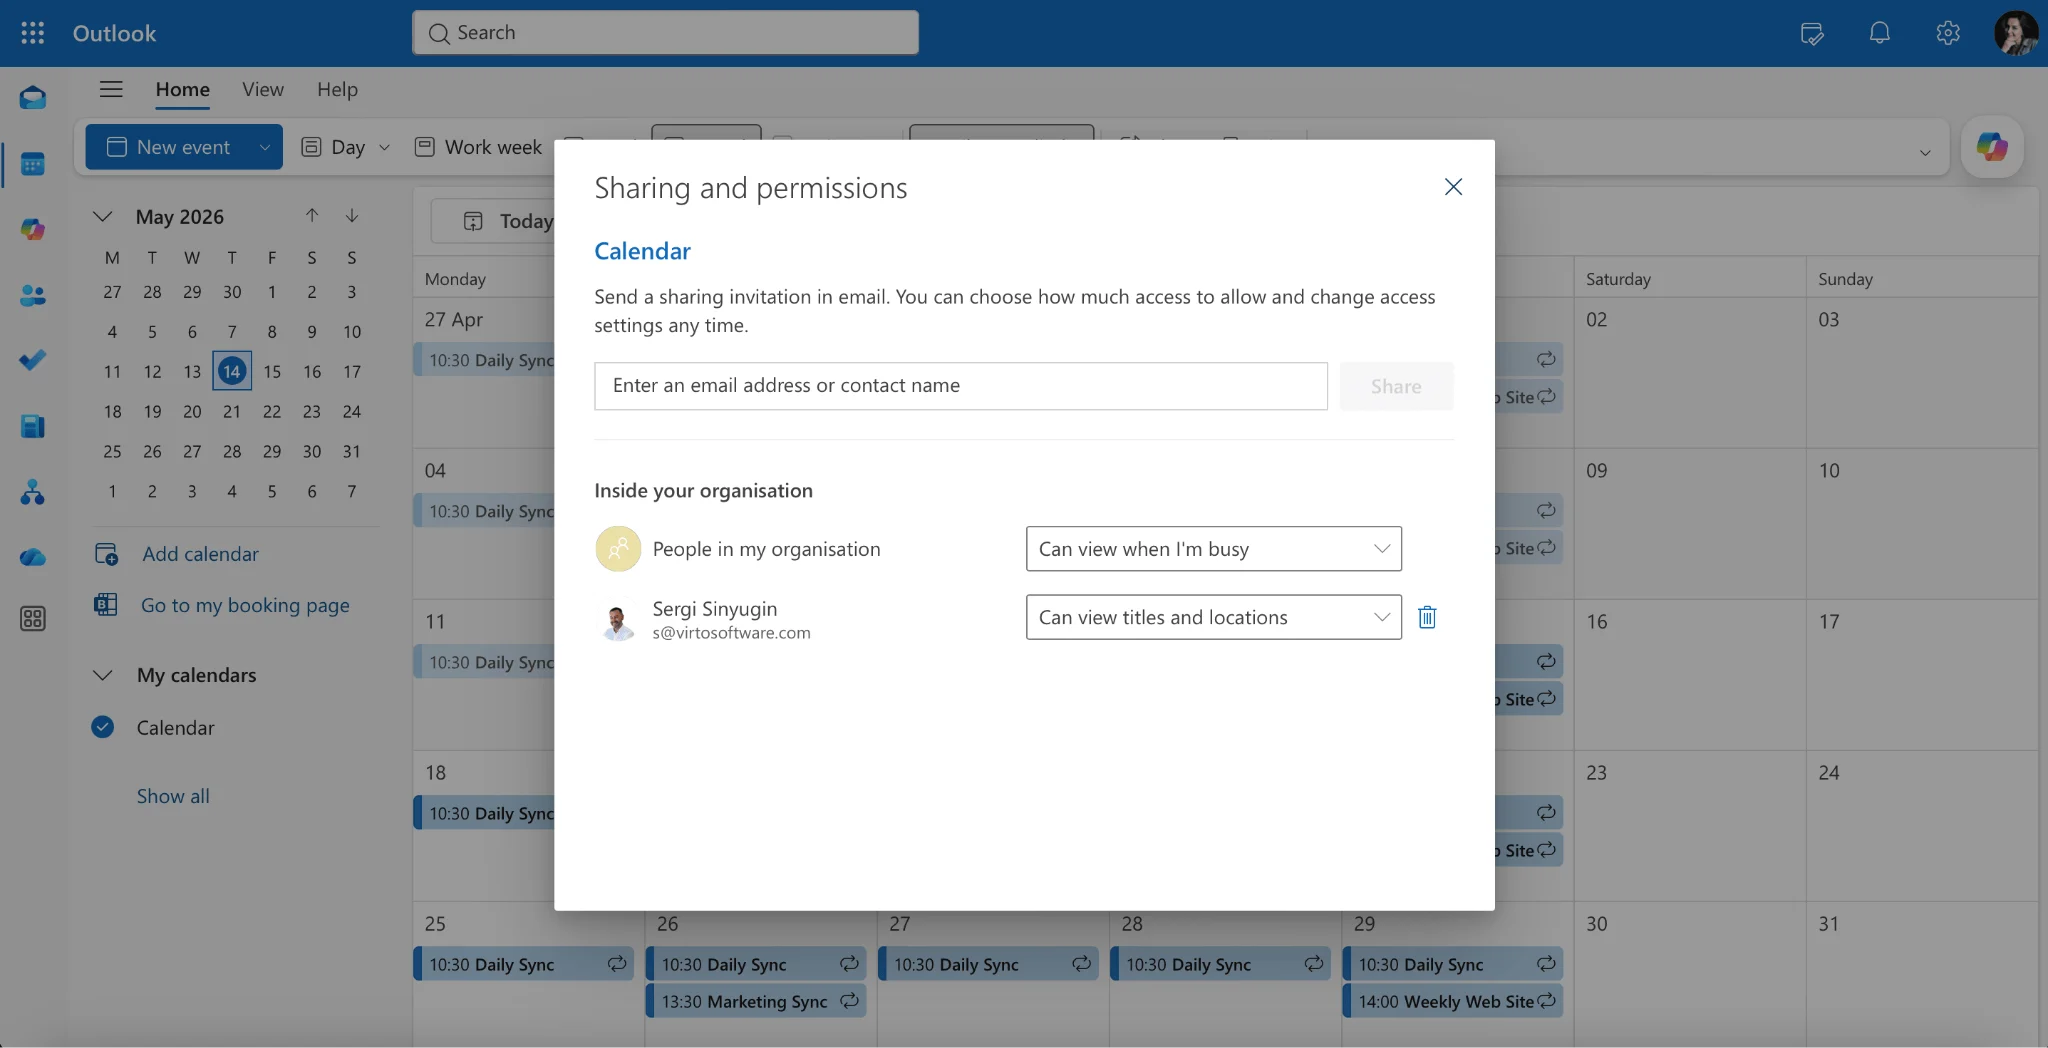
Sharing & Permissions dialog
Once people accept, they can add events directly to the shared calendar (using the steps from the Quick Answer block above) — or you can ask each person to invite the shared calendar as an additional attendee on their own PTO events. Color-code by department or leave type to keep the view scannable.
Shared Vacation Calendar in Microsoft Teams
Microsoft Teams doesn’t ship a dedicated vacation calendar, but it can surface the shared Outlook calendar you just created. The fastest way to do that in 2026:
- Open the Teams channel where your team coordinates.
- Click "+" → “Website” (or the Virto Calendar app from AppSource), and paste the OWA URL of the shared calendar.
- Rename the tab to “Team Vacations” and pin it. Everyone in the channel now sees the same calendar in real time.
Microsoft Teams channel with pinned vacation calendar tab
Want a cleaner multi-calendar view inside Teams? Skip ahead to the Virto Calendar App section below.
Limitations of the Native Outlook Vacation Calendar
Outlook’s built-in vacation calendar works for individual scheduling, but organizations with 10+ people quickly run into constraints. The pain points below are the ones we hear most often from teams using Virto.
- No consolidated team view. Outlook shows each colleague’s calendar separately. To see who’s on vacation this week, a manager has to open 10 individual calendars or use a Scheduling Assistant one person at a time. There’s no single “team vacation overview” screen.
- No vacation request workflow. Outlook has no built-in approval system. Employees email their manager or use a separate HR tool, and changes to vacation plans require manual calendar updates with no audit trail.
- No cross-source aggregation. If your team uses a mix of SharePoint lists, Planner tasks, and personal Outlook calendars, there’s no way to see all absences — planned vs. actual — in one view.
- Permission complexity at scale. Setting up proper sharing permissions for 50+ users is error-prone and time-consuming. New employees frequently can’t see the shared calendar because they were never added.
- No Gantt or Year View. Outlook’s calendar views (day/week/month) aren’t designed for planning resource coverage weeks or months ahead.
If any of these limitations sound familiar, Virto Calendar App was built specifically to solve them — within your existing Microsoft 365 environment.
👉 See how Virto Calendar App shows your entire team’s vacation schedule in one view →
Virto Calendar App: Vacation Management for Microsoft 365
You’ve set up vacation entries in Outlook. Here’s what happens when your team grows past 10 people and native Outlook starts to break down — and how Virto Calendar App handles it.
Virto Calendar App is a Microsoft 365 / SharePoint Online add-on built around one idea: every calendar your team uses — Exchange mailboxes, SharePoint lists, Planner, iCal feeds — overlaid into a single view, with planning views that Outlook doesn’t offer.
Vacation-specific features to know
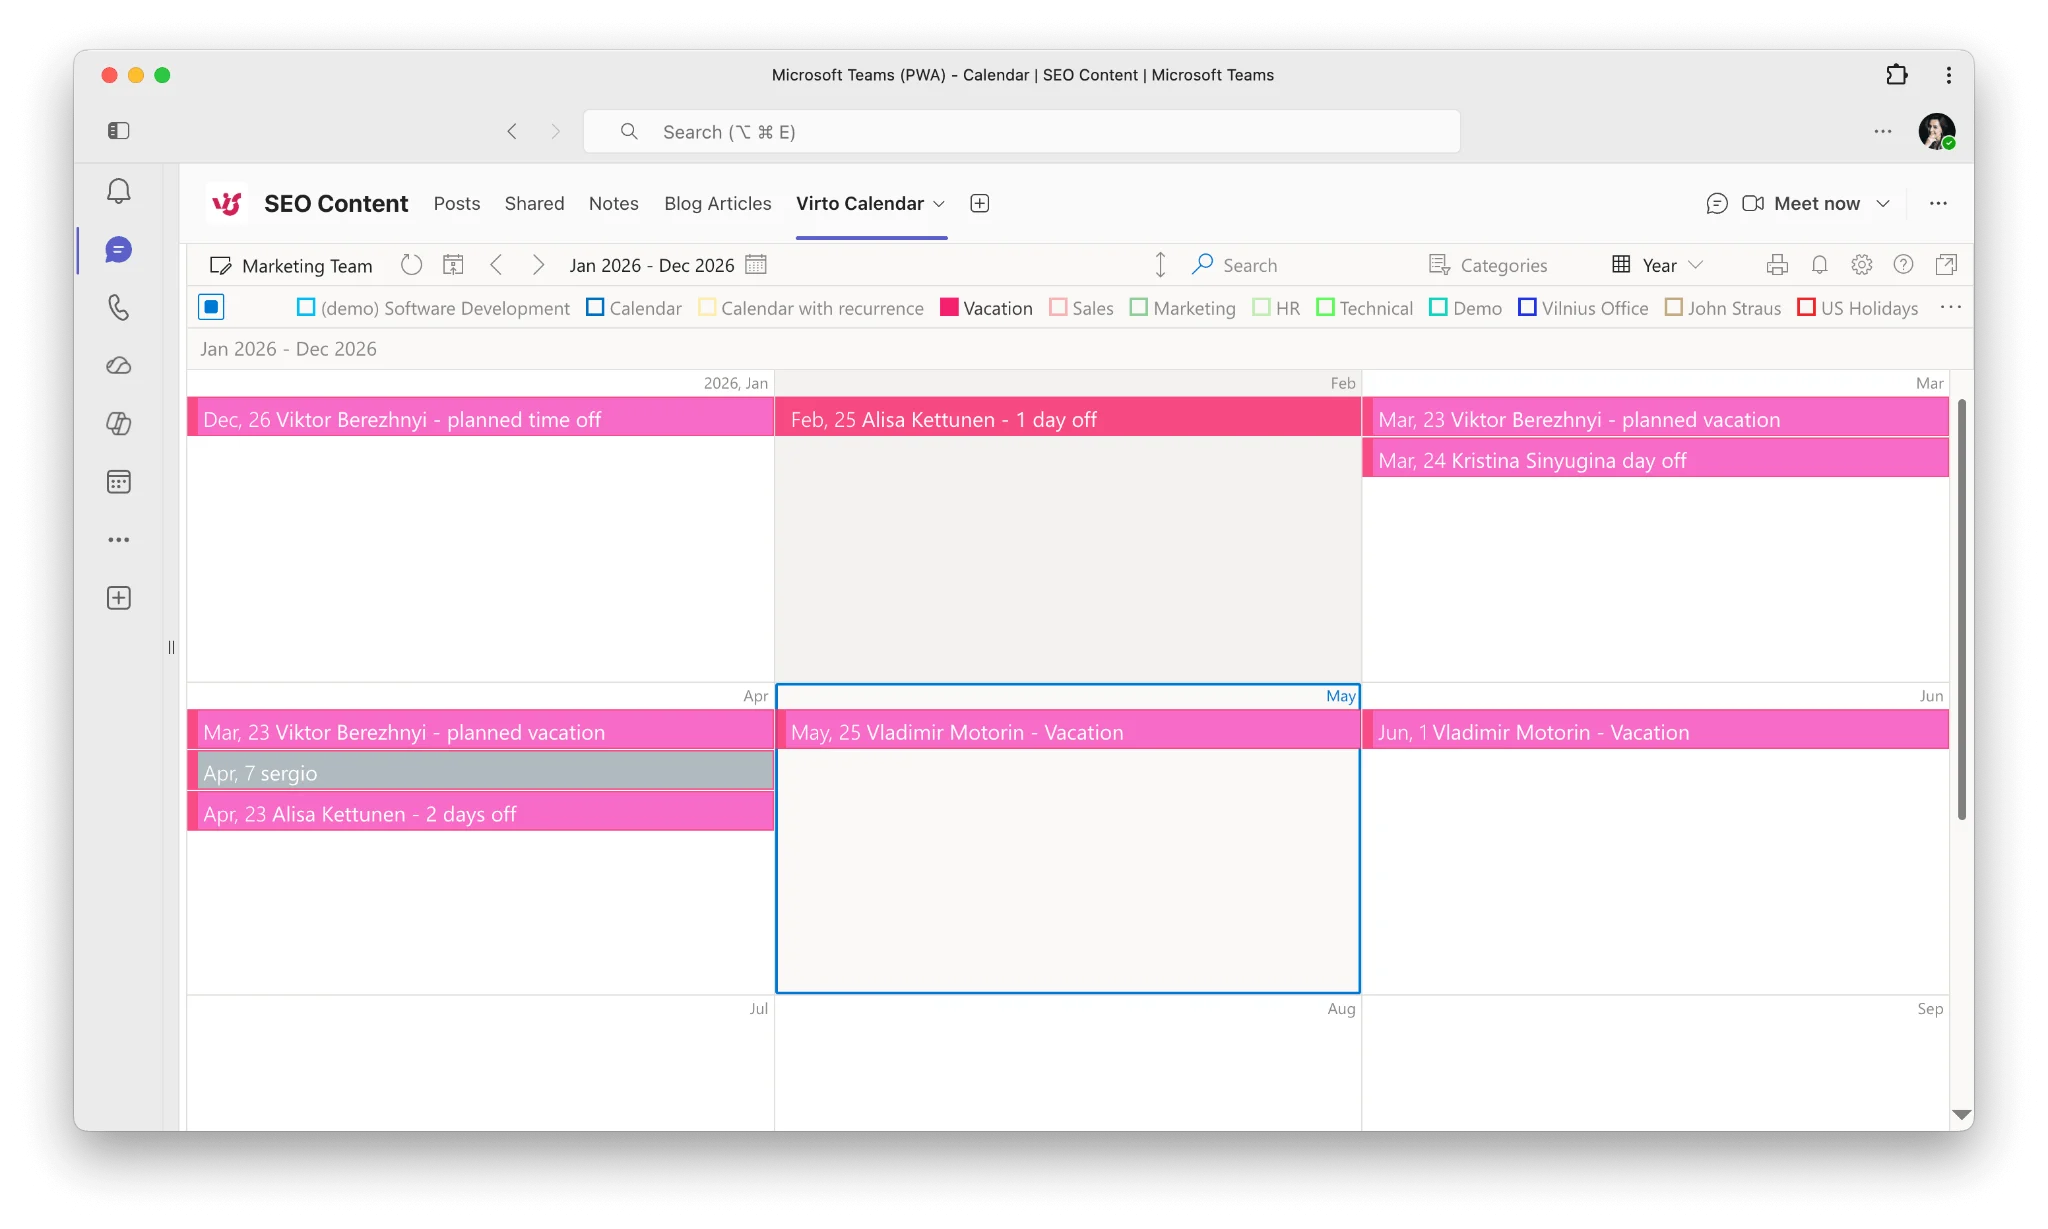
- Flat Year View. See the entire year’s vacation schedule for your team on one screen — instead of clicking through 12 month views.
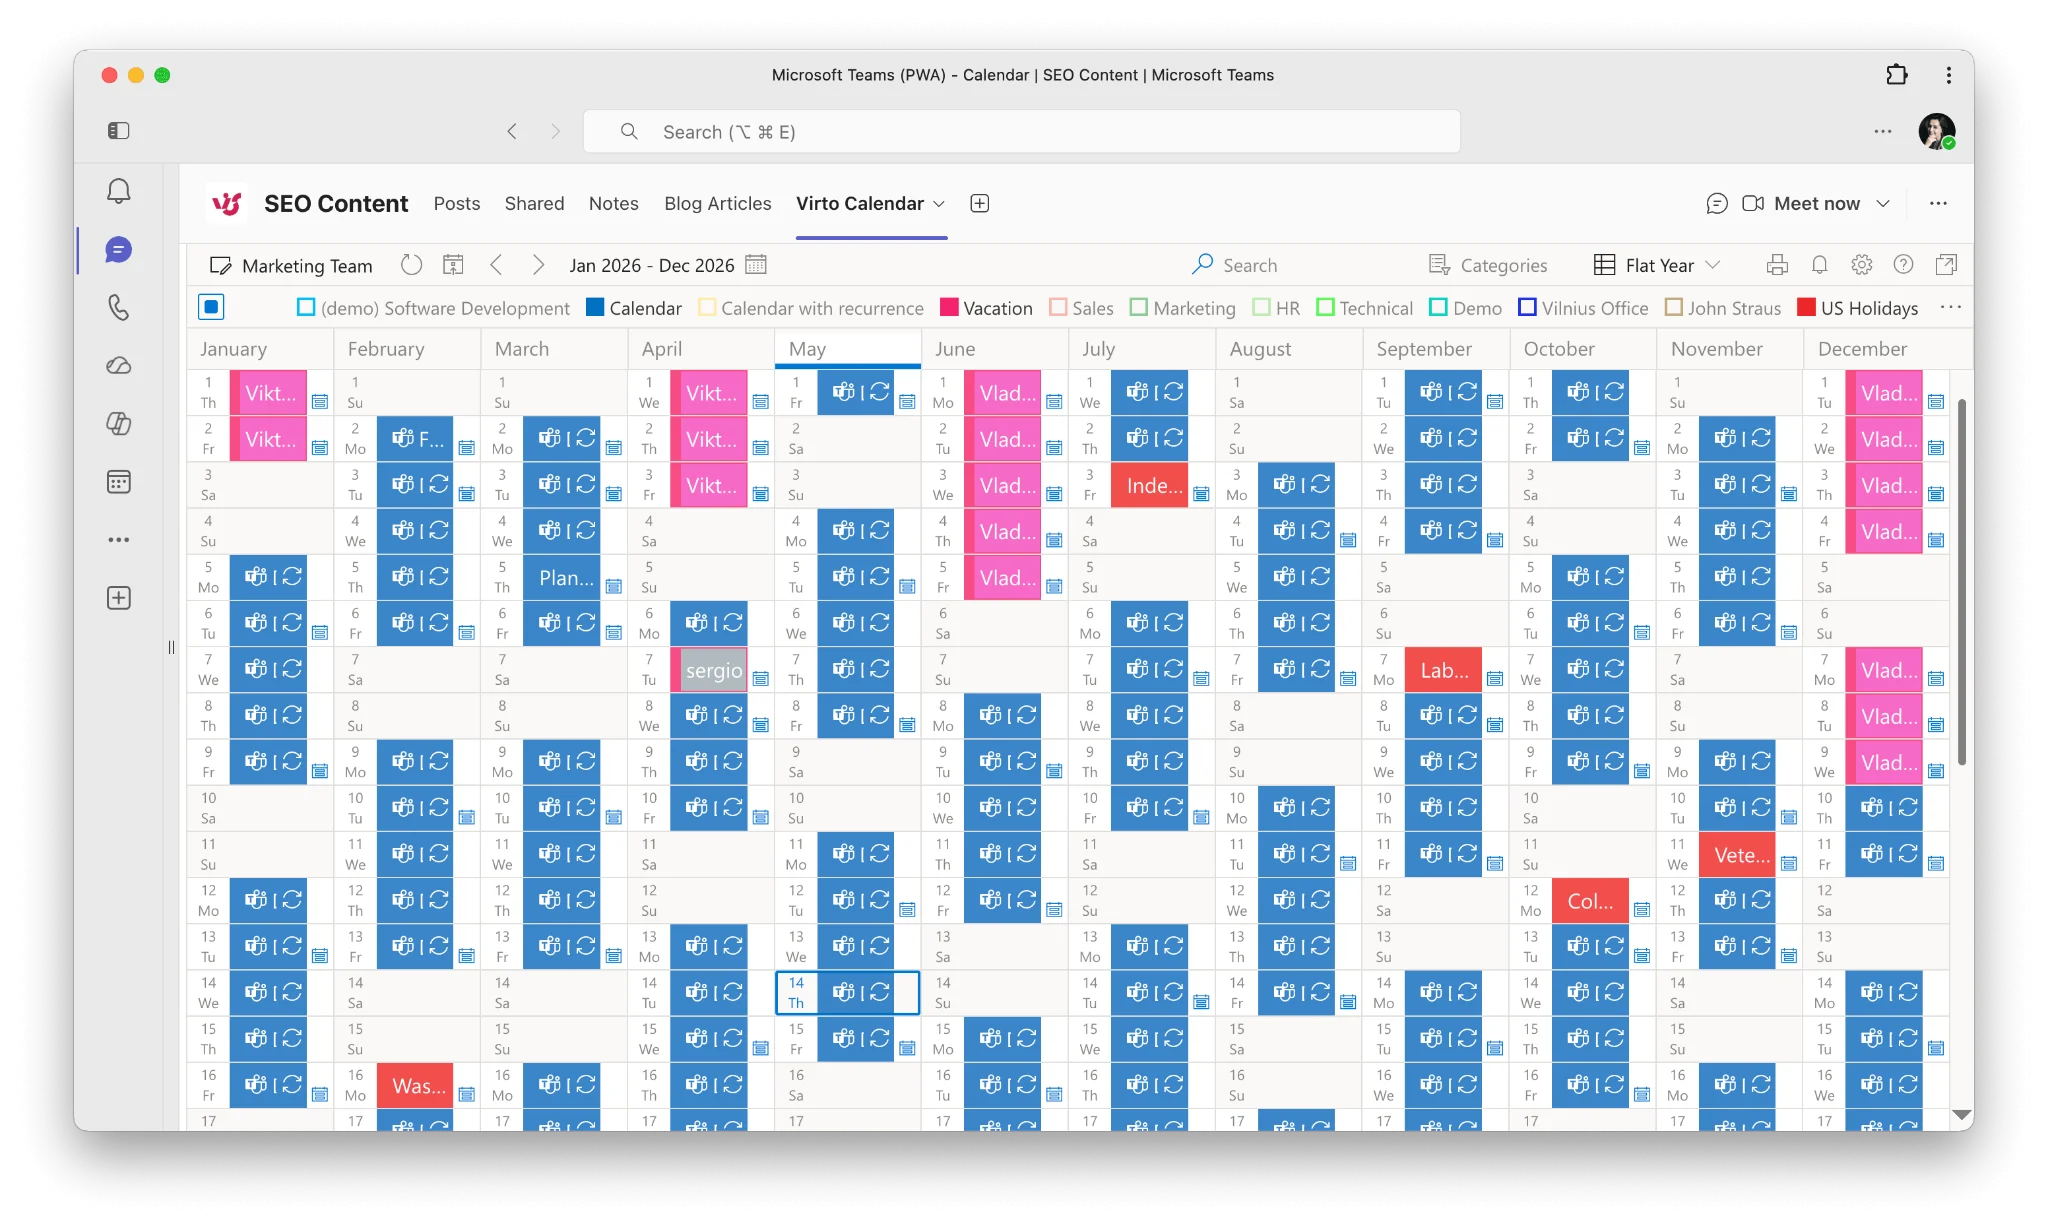
Virto Calendar App — Flat Year View
- Unlimited calendar overlay. Combine every department, region, or project calendar into one consolidated view — no tab switching, no chasing down who shared what.
- Self-hosted in your Azure. Deploy in your own Azure subscription so HR and absence data never leaves your tenant — critical for regulated industries.
- Free for a month. Try it in your team before rolling out organization-wide.
- Built-in approval workflows. Customizable request → approve → notify flow without bolting on a third-party HR tool.
Here’s how Virto Calendar App compares to native Outlook for vacation management:
| Capability | Outlook Native | Virto Calendar App |
|---|---|---|
| Add vacation to personal calendar | Yes | Yes |
| Shared team vacation calendar | Manual setup, limited | Unlimited calendars in one view |
| Vacation request & approval workflow | Not available | Built-in customizable workflows |
| Overlay multiple calendar sources | Exchange only | Exchange + SharePoint + Planner + iCal |
| Year / Gantt view for planning | Not available | Flat Year View + Gantt |
| Color-code by department / type | Categories only | Per-source color coding |
| Self-hosted (data stays in your Azure) | Yes (M365) | Yes — deploy in your own Azure subscription |
| Free tier | Included with M365 | Free for a month |
Ready to try it?
→ See Virto Calendar App — full product walkthrough and pricing.
→ Start free and try for a month — install from AppSource in minutes.
→ Book a demo — a 20-minute walkthrough with the Virto team.
Frequently Asked Questions
How do I add vacation to my Outlook calendar?
Create a new calendar event for your vacation dates. Set the title to “Vacation” or “Annual Leave”, check “All day”, and set “Show As” to “Out of Office”. Save. To also send automatic email replies, configure Automatic Replies separately in Settings.
How do I add PTO to my Outlook calendar?
Same process as adding vacation: create a new event, title it “PTO”, check “All day”, and set “Show As” to “Out of Office”. If your organization tracks PTO in a shared calendar, add the event there as well so managers can see team availability.
Does Microsoft Teams have a vacation calendar?
Teams doesn’t have a built-in vacation calendar feature. It relies on Outlook calendar integration — vacation events created in Outlook appear in Teams automatically. For a dedicated team vacation view, you can use a shared Outlook calendar pinned as a Teams tab, or use Virto Calendar App for a consolidated multi-source view.
How do I create a shared vacation calendar in Outlook?
In Outlook, right-click “My Calendars” → “New Calendar”, name it “Team Vacation Calendar”. Right-click the new calendar → “Sharing and Permissions”, add team members and set their permission level to “Can view when I’m busy” or “Can view all details”. They’ll receive an email invitation to access the calendar.
What’s the difference between “Busy” and “Out of Office” in Outlook?
“Busy” shows you’re occupied but doesn’t signal absence. “Out of Office” explicitly signals you’re not available — it triggers automatic reply prompts and displays differently in Scheduling Assistant. For vacation, always use “Out of Office”.
How do I show vacation time on a team calendar in Microsoft 365?
Create a shared vacation calendar in Outlook and share it with your team. In Teams, add it as a tab using the “Website” or “Virto Calendar” app. For org-wide visibility across multiple departments and calendar sources, Virto Calendar App provides a single consolidated view without manual sharing setups.
Manage Vacations at Scale with Virto Calendar App
Adding vacation to your Outlook calendar takes six clicks. Coordinating vacations across a 50-person team takes a different tool. If you’ve worked through this guide and any of the limitations above resonated, give Virto Calendar App a try — it’s free for a month, deploys inside your own Azure tenant, and lets you see every team member’s vacation schedule on one screen.
