Sharing your Outlook calendar is one of the simplest ways to cut down on back-and-forth scheduling emails and keep your team aligned. Whether you want a colleague to see when you’re free, give an assistant the ability to manage your meetings, or let an outside client view your availability, Outlook gives you fine-grained control over who sees what. This 2026 guide walks you through sharing an existing Outlook calendar step by step — across both Outlook on the web and the desktop app — explains every permission level, covers external sharing, and shows an easier overlay-and-link approach with Virto Calendar when Outlook’s native sharing isn’t flexible enough.
In this article you’ll learn:
- The fastest way to share your Outlook calendar (quick answer).
- How to share your calendar step by step on the web and desktop.
- What each Outlook permission level actually exposes.
- How to share your calendar with people outside your organization — safely.
- Where to go if you need to create a shared calendar instead of sharing an existing one.
- An easier, more flexible sharing option with Virto.
Looking to create a brand-new shared calendar from scratch (a team or department calendar everyone updates)? That’s a different task — head to our dedicated guide, How to Create an Office 365 Shared Calendar. This article focuses on sharing a calendar you already have.
Quick Answer: How to Share Your Outlook Calendar
In a hurry? Here’s the short version:
- Open Calendar in Outlook (web or desktop).
- Right-click the calendar you want to share and choose Sharing and permissions (on the web, click Share at the top right).
- Enter the email address of the person you want to share with.
- Choose a permission level — availability only, titles and locations, all details, or edit.
- Click Send / Share. The recipient gets an email invitation to add your calendar.
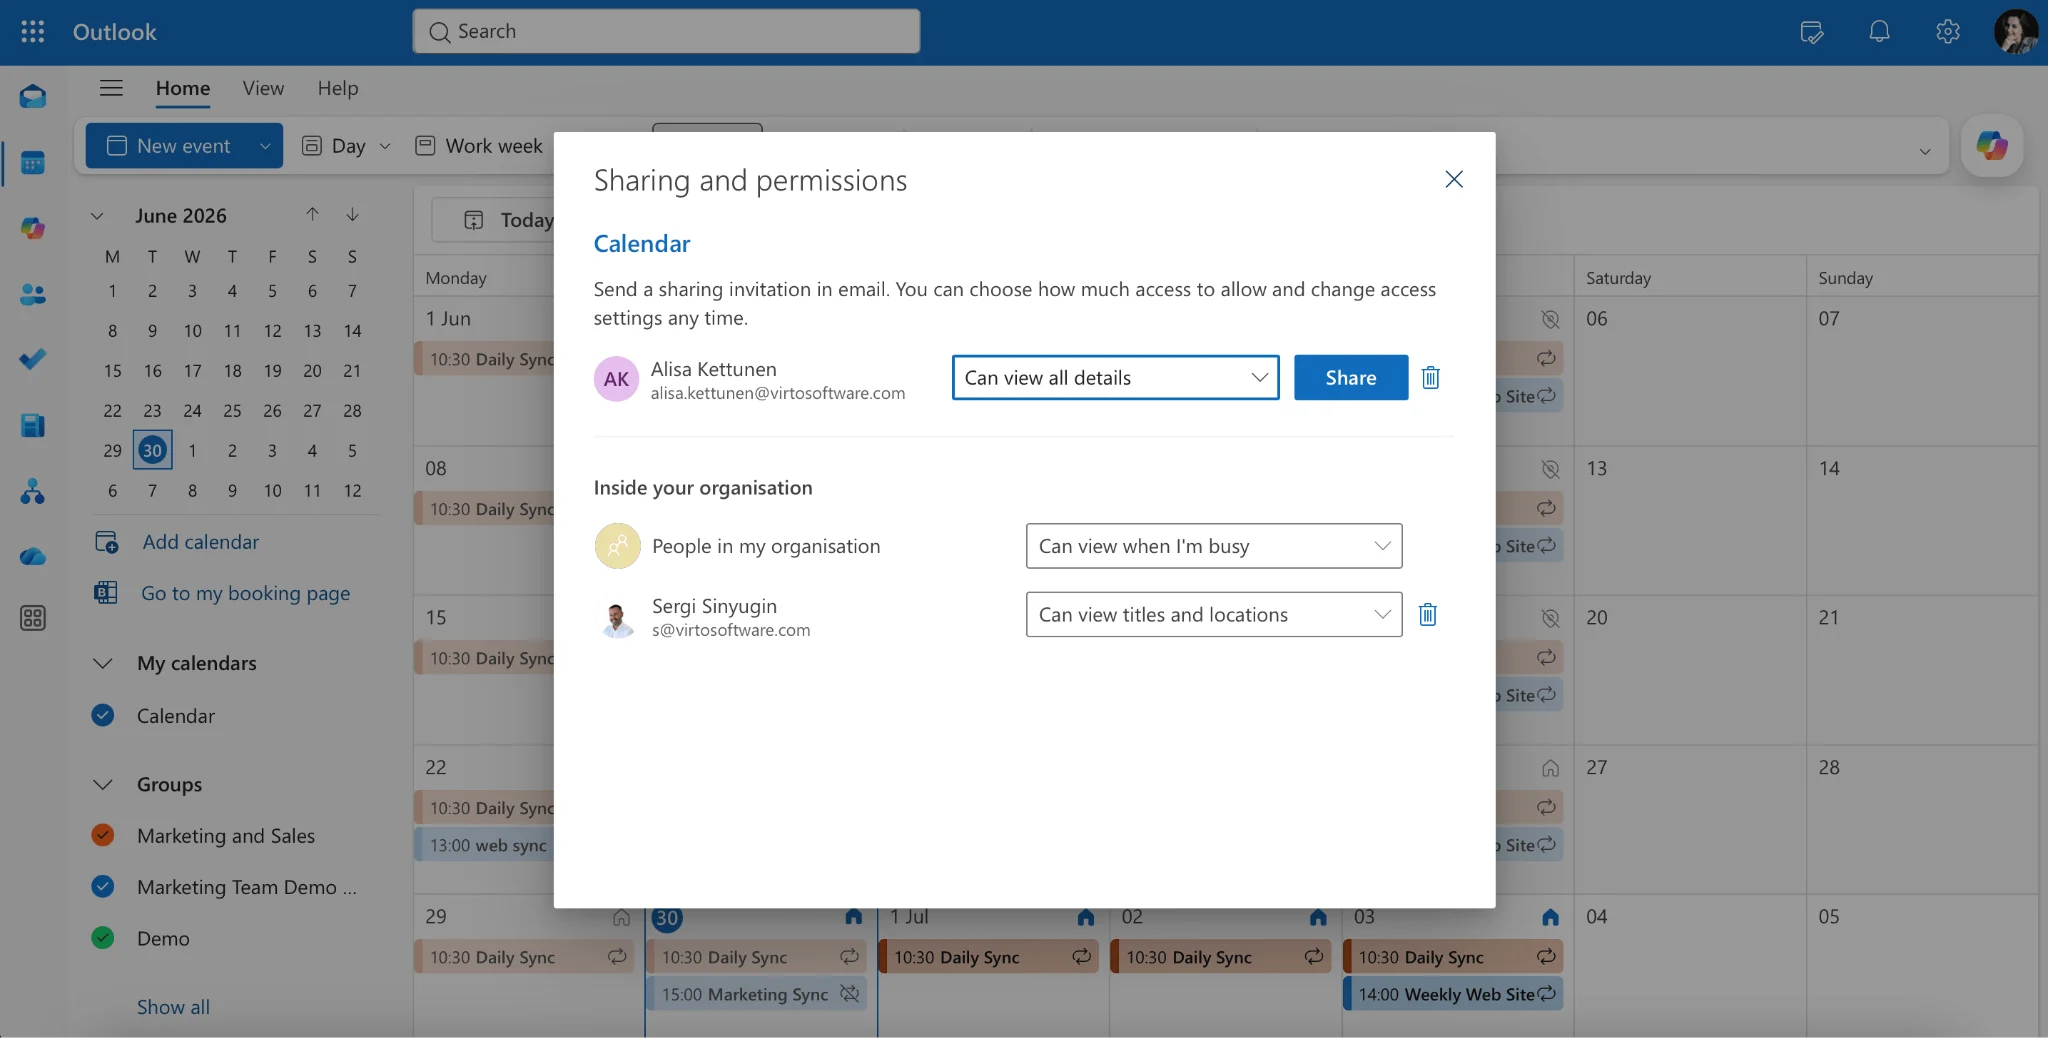
Pic. 1. The two-click path to sharing your Outlook calendar.
Share Your Outlook Calendar Step by Step (Web + Desktop)
The sharing flow is nearly identical on both platforms — only the button labels differ slightly. Below are both, so you can follow along wherever you work.
Outlook on the web (Microsoft 365)
- Sign in to Outlook on the web and select the Calendar icon in the left rail.
- In the My calendars list, hover over the calendar you want to share, click the ••• (more options) button, and choose Sharing and permissions. You can also click Share at the top right of the calendar view.
- Type the name or email address of the person you want to share with and press Enter.
- Select a permission level from the dropdown next to their name (explained in the next section).
- Click Share. The recipient receives an email invitation; once they accept, your calendar appears under their People’s calendars / Shared calendars section.
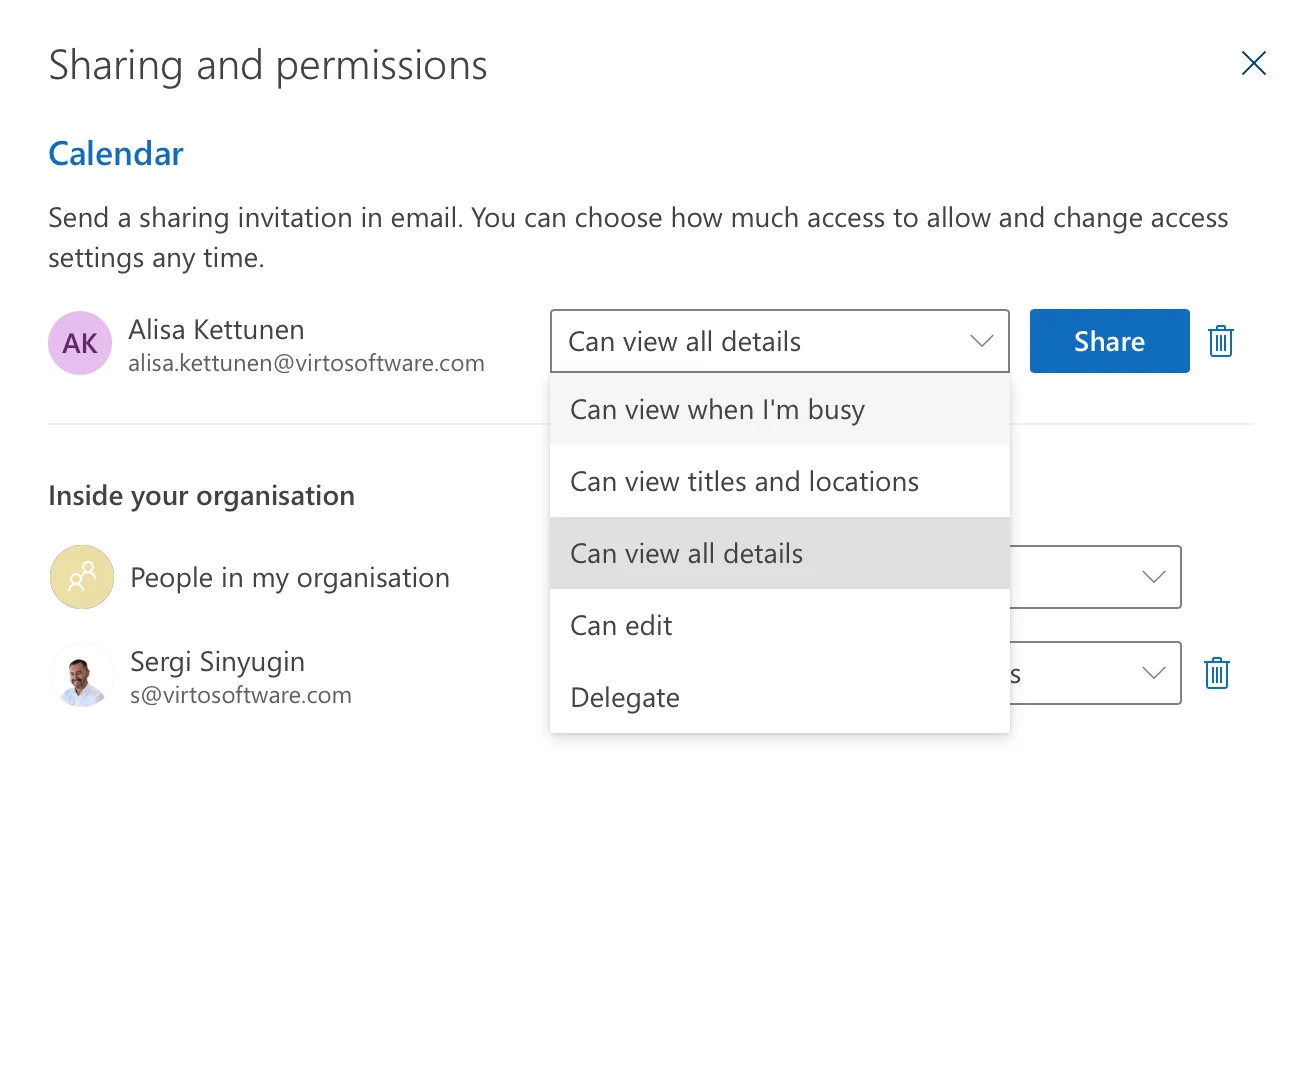
Pic. 2. Adding a recipient and choosing a permission level in Outlook on the web.
Outlook desktop (Windows)
- Open Outlook and switch to Calendar using the icon in the bottom-left navigation bar.
- In the navigation pane, right-click the calendar you want to share and select Sharing and permissions (or Calendar Permissions on some builds).
- In the Calendar Properties dialog, click Add and enter the names or email addresses of your recipients.
- Select each person and set their permission level from the list.
- Click OK / Apply. Outlook sends a sharing invitation the recipient can accept.
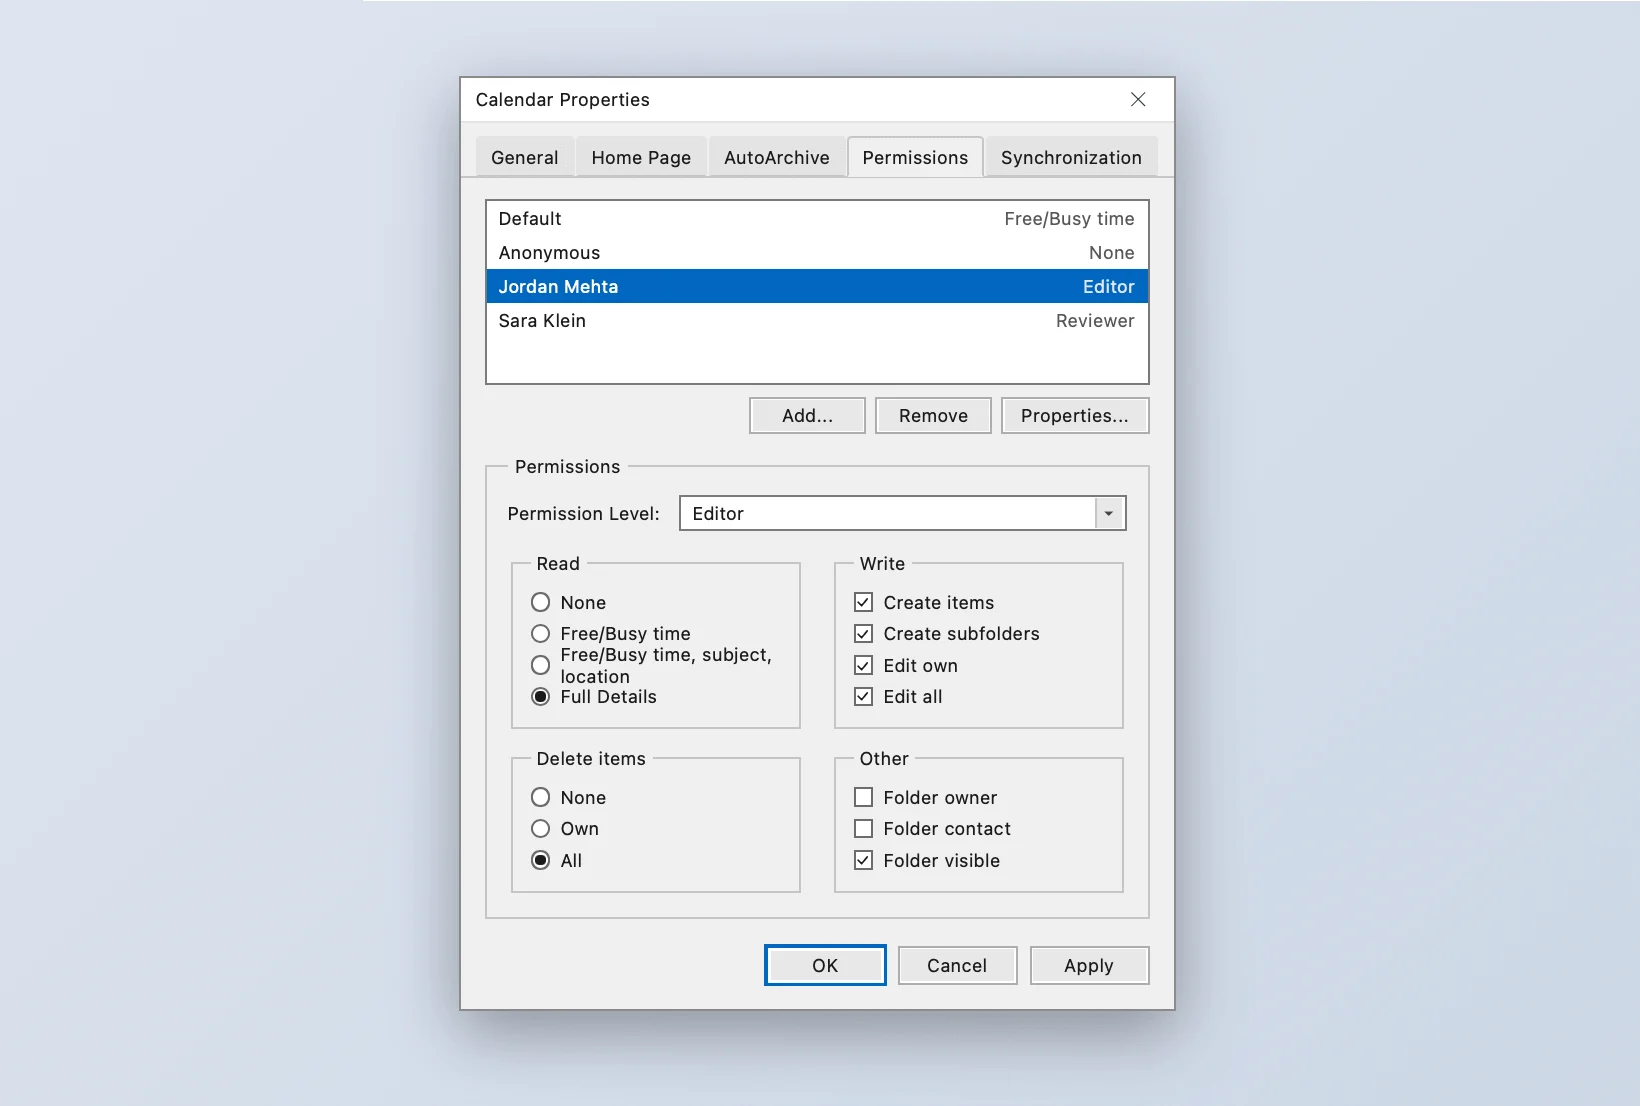
Pic. 3. Setting calendar permissions in the Outlook desktop app.
Tip: You can also share from the Outlook mobile app — open Calendar, tap Settings (gear) next to the calendar you want to share, tap Add People, enter an email, pick an access level, and send.
Outlook Calendar Permission Levels Explained
Choosing the right permission level is the most important part of sharing, because it controls exactly how much of your schedule another person can see. Outlook offers four main levels, from least to most access:
| Permission level | What the other person sees | Best for |
|---|---|---|
| Can view when I’m busy (availability only) | Only free/busy blocks — no titles, locations, or details. | Letting people schedule around you while keeping everything private. |
| Can view titles and locations | Free/busy plus the event title and location, but no notes or attendees. | Light context for coworkers without exposing sensitive detail. |
| Can view all details | Full event details: titles, locations, descriptions, attendees, and notes. | Close collaborators and managers who need full context. |
| Can edit | Everything above, plus the ability to add, change, and delete events. | Assistants and coordinators who manage your calendar for you. |
Fig. 1. Outlook calendar sharing permission levels at a glance.
A fifth option, Delegate access, goes a step further than Can edit: a delegate can not only manage your calendar but also receive and respond to meeting invitations on your behalf. Set it up in the desktop app under File ▸ Account Settings ▸ Delegate Access. Use it sparingly and only for people you fully trust, such as an executive assistant.
Rule of thumb: start with the least access that still gets the job done. You can always raise it later, and availability only is almost always the safe default for anyone outside your immediate team.
Share Your Outlook Calendar with External People
Sharing with someone outside your organization — a client, partner, or contractor — works through the same flow, but with a few important caveats.
- Your admin controls it. External calendar sharing must be enabled by your Microsoft 365 administrator. If the option is greyed out or your invitation never arrives, organizational policy is likely blocking it — ask IT to confirm external sharing is allowed.
- External recipients usually see less. People outside your tenant are often limited to availability-only or limited details, even if you select a higher level.
- Choose conservatively. For anyone outside your company, Can view when I’m busy is the recommended default — it lets them schedule around you without exposing what your meetings are about.
- Anonymous links are a separate feature. Outlook’s native sharing is built around named recipients with Microsoft accounts. If you need to share with someone who has no Microsoft account at all, see the Virto option below.
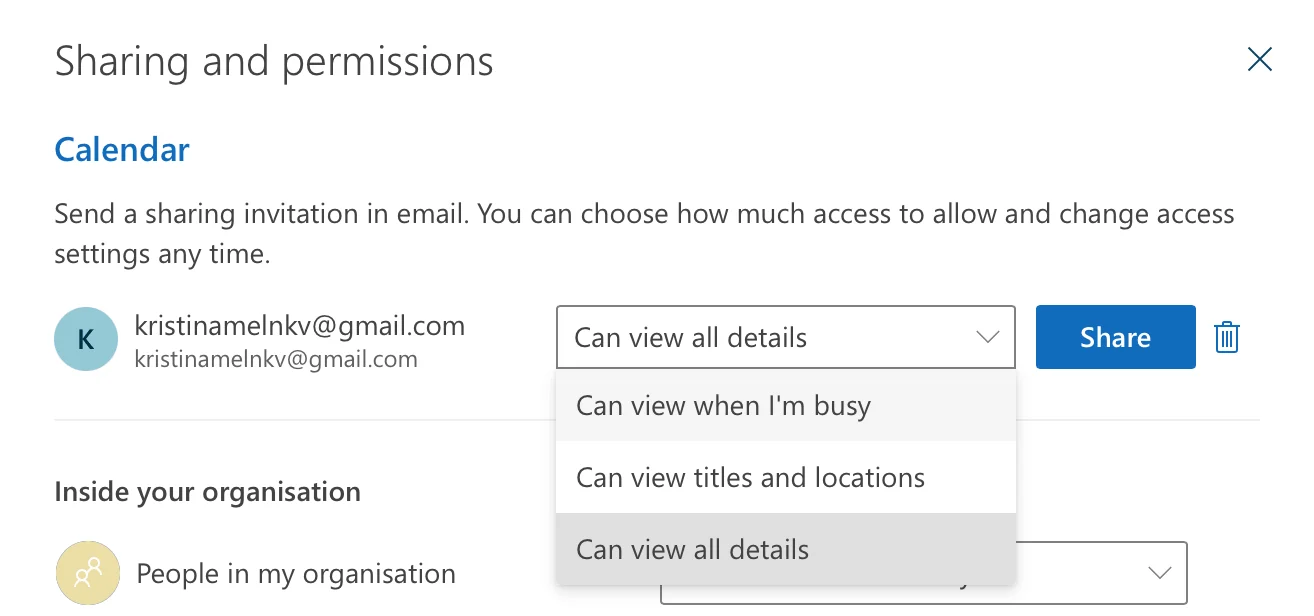
Pic. 4. External recipients are typically restricted to a conservative permission level.
Need to Create a Shared Calendar Instead?
Everything above covers sharing a calendar you already own. If what you actually need is a brand-new, separate calendar that a whole team owns and updates together — a project calendar, a department calendar, a team vacation calendar — that’s a creation task, not a sharing one.
We cover that end to end in a dedicated guide so this page can stay focused: How to Create an Office 365 Shared Calendar. It walks through creating the calendar, choosing where it lives, and inviting your team.
A couple of related reads if you’re juggling several calendars: managing multiple Microsoft 365 calendars, and what to do when your Outlook calendar isn’t syncing.
Easier Sharing Beyond Outlook with Virto Calendar
Outlook’s built-in sharing is solid, but it runs into limits fast: every recipient needs a Microsoft account, external sharing depends on admin policy, and overlaying many calendars into one clear view is clunky. Two Virto products close those gaps.
Virto Calendar App — overlay many calendars in one view
Virto Calendar App for Microsoft 365 and SharePoint lets you overlay multiple calendars — Exchange Online, SharePoint, Google, iCal feeds and more — into a single colour-coded view, then surface it as a tab inside Microsoft Teams. Instead of toggling between separate shared calendars, your team sees everything at once.
- Aggregate Exchange, SharePoint, Google, and iCal calendars into one view.
- Advanced colour-coding by source and category.
- Daily, weekly, monthly, quarterly, and Gantt-style views.
- Add the calendar as a dedicated Microsoft Teams tab.
- Inherits SharePoint permissions for granular, secure access.
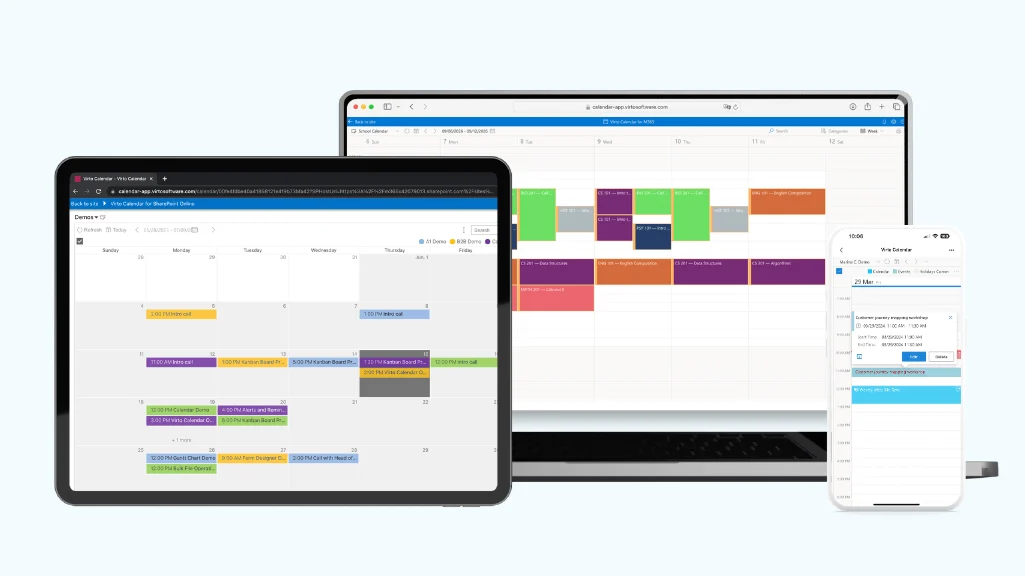
Pic. 5. Virto Calendar App overlays multiple sources into one colour-coded view.
Virto Shared Calendar — share with anyone, even without a Microsoft account
Virto Shared Calendar is built for the case Outlook handles worst: sharing with external guests. It offers anonymous link sharing — send a link to anyone, no Microsoft account required — alongside a clean, fast-to-set-up shared calendar that works in Teams, Outlook, and any web browser.
- Anonymous sharing: hand a link to external partners or clients, no account needed.
- Works as a Microsoft Teams tab, a Microsoft 365 app, and in the browser.
- Intuitive event creation, tagging, and colour-coding.
- Minimal setup — usable in seconds.

Pic. 6. Virto Shared Calendar lets you share with external guests via a simple link.
Pricing starts at $2/user/mo (Starter, up to 30 users), $3/user/mo (Pro, 31–200 users), with Enterprise pricing on request and a 30-day free trial. You can start a free trial or request a demo to see it on your own calendars.
FAQ: Sharing Your Outlook Calendar
How do I share my Outlook calendar?
Open Calendar in Outlook, right-click the calendar you want to share and choose Sharing and permissions (or click Share on the web). Enter the person’s email, pick a permission level — availability, limited details, all details, or edit — and send. The recipient gets an email invitation to add your calendar.
Can I share my Outlook calendar with someone outside my organization?
Yes, provided your Microsoft 365 administrator allows external sharing. Use the same sharing flow, but external recipients are usually limited to a conservative level such as availability-only. If you need to share with someone who has no Microsoft account, use Virto Shared Calendar’s anonymous link instead.
What permission levels can I set when sharing an Outlook calendar?
Four main levels: Can view when I’m busy (availability only), Can view titles and locations, Can view all details, and Can edit. A separate Delegate access option also lets someone respond to meeting requests on your behalf.
How do I stop sharing my Outlook calendar?
Open Sharing and permissions for that calendar again, find the person in the list, and either lower their permission or remove them entirely. Changes take effect right away.
What’s the difference between sharing and creating a shared calendar?
Sharing gives others access to a calendar you already own. Creating a shared calendar means making a brand-new, separate calendar for a team to use together — see How to Create an Office 365 Shared Calendar for that.
Conclusion
Sharing your Outlook calendar comes down to two decisions: who you share with and how much they can see. Right-click the calendar, pick a permission level that matches the relationship, and you’re done — start conservative and open up access only as needed.
When Outlook’s native sharing hits its limits — overlaying many calendars, or sharing with people who don’t have Microsoft accounts — Virto Calendar App and Virto Shared Calendar pick up where it leaves off. Both offer a free trial, so you can try them against your own setup before committing.
Further reading:
