Works for Classic Outlook, New Outlook, Mac, and OWA.
Quick answer: To overlay calendars in Outlook, open Calendar view, tick the checkboxes next to the calendars you want to show, then click the left-pointing arrow on each calendar tab to switch from side-by-side to overlay mode. Steps differ between Classic Outlook (Windows), New Outlook (2024+), Mac, and OWA—see the section for your version below.
Juggling separate calendars for different projects, teams, or family members quickly becomes overwhelming. Calendar overlay solves this by layering multiple calendars into a single view, so you can spot conflicts, find free slots, and keep work and personal commitments visible at once.
This guide walks through overlaying calendars on every Outlook platform, explains the difference between overlaying and merging, and shows how the Virto Calendar App handles unlimited calendar sources when the native feature falls short. For SharePoint users, see our separate guide on how to overlay SharePoint calendars.
What is calendar overlay in Outlook?
Calendar overlay lets you view multiple calendars simultaneously by layering them on top of each other in a single view—like stacking transparent sheets so every schedule shows in one place. Outlook supports overlaying calendars from many sources, including personal calendars, shared team calendars, and resource calendars, across both desktop and web.
Why use it:
- Simplified scheduling—see personal, team, project, and resource calendars in one unified view instead of switching windows.
- Conflict prevention—spot clashes between personal and work commitments at a glance.
- Resource optimization—find free slots across multiple people’s calendars when planning meetings.
- Better collaboration—share calendar visibility while keeping the option to view calendars separately.
How to overlay calendars in Classic Outlook for Windows
TL;DR: Tick the calendars in the Navigation Pane, then click the left-pointing arrow on each calendar tab to merge it into overlay mode. Click the arrow again to return to side-by-side.
- Open calendar view: launch Outlook and click the Calendar icon in the navigation pane. Choose Month, Week, or Day view.
- Access additional calendars: in the Navigation Pane, find “My Calendars” and check the boxes for the calendars you want. They first appear side by side. To add a shared calendar, right-click in “My Calendars” and choose “Add Calendar” or “Add Shared Calendar.” See also our guide on how to view someone’s calendar in Outlook.
- Enable overlay mode: click the small left-pointing arrow at the header of each calendar tab. The calendars merge into one space, and it helps to color-code your calendar by source so overlapping events stay easy to tell apart.
- Customize your view: right-click each calendar to assign contrasting colors, adjust permissions via “Properties,” and use the View tab to fine-tune text size and gridlines.
Pro tip: The overlay arrows are toggles—click again to return to side-by-side view. Use overlay for checking availability and side-by-side for detailed planning.
How to overlay calendars in New Outlook (2024+)
New Outlook (the 2024+ default for Windows) dropped the classic ribbon and the overlay arrow toggle, so the process is different from Classic Outlook. Overlay is automatic—there is no separate “overlay mode” button.
- Open the Calendar from the left navigation bar.
- In the left pane, tick the checkbox next to each calendar you want to see. Checked calendars are layered into a single overlaid view automatically—no arrow toggle needed.
- Right-click any calendar (or select the three-dot menu next to its name) to change its color so overlapping events stay easy to tell apart.
- To add a calendar, select “Add calendar” at the top of the calendar list, then add from your directory, import an .ics file, or subscribe from the web.

Pic. New Outlook overlays checked calendars automatically—no arrow toggle.
Note: Because overlay is the default in New Outlook, unchecking a calendar simply removes its layer. There is no side-by-side arrow as in Classic Outlook.
How to overlay calendars in Outlook for Mac
Outlook for Mac takes a slightly different approach from Windows but is equally capable.
- Access calendar view: open Outlook for Mac, click the Calendar icon on the left, and pick a view (Day, Three Day, Working Week, Week, or Month).
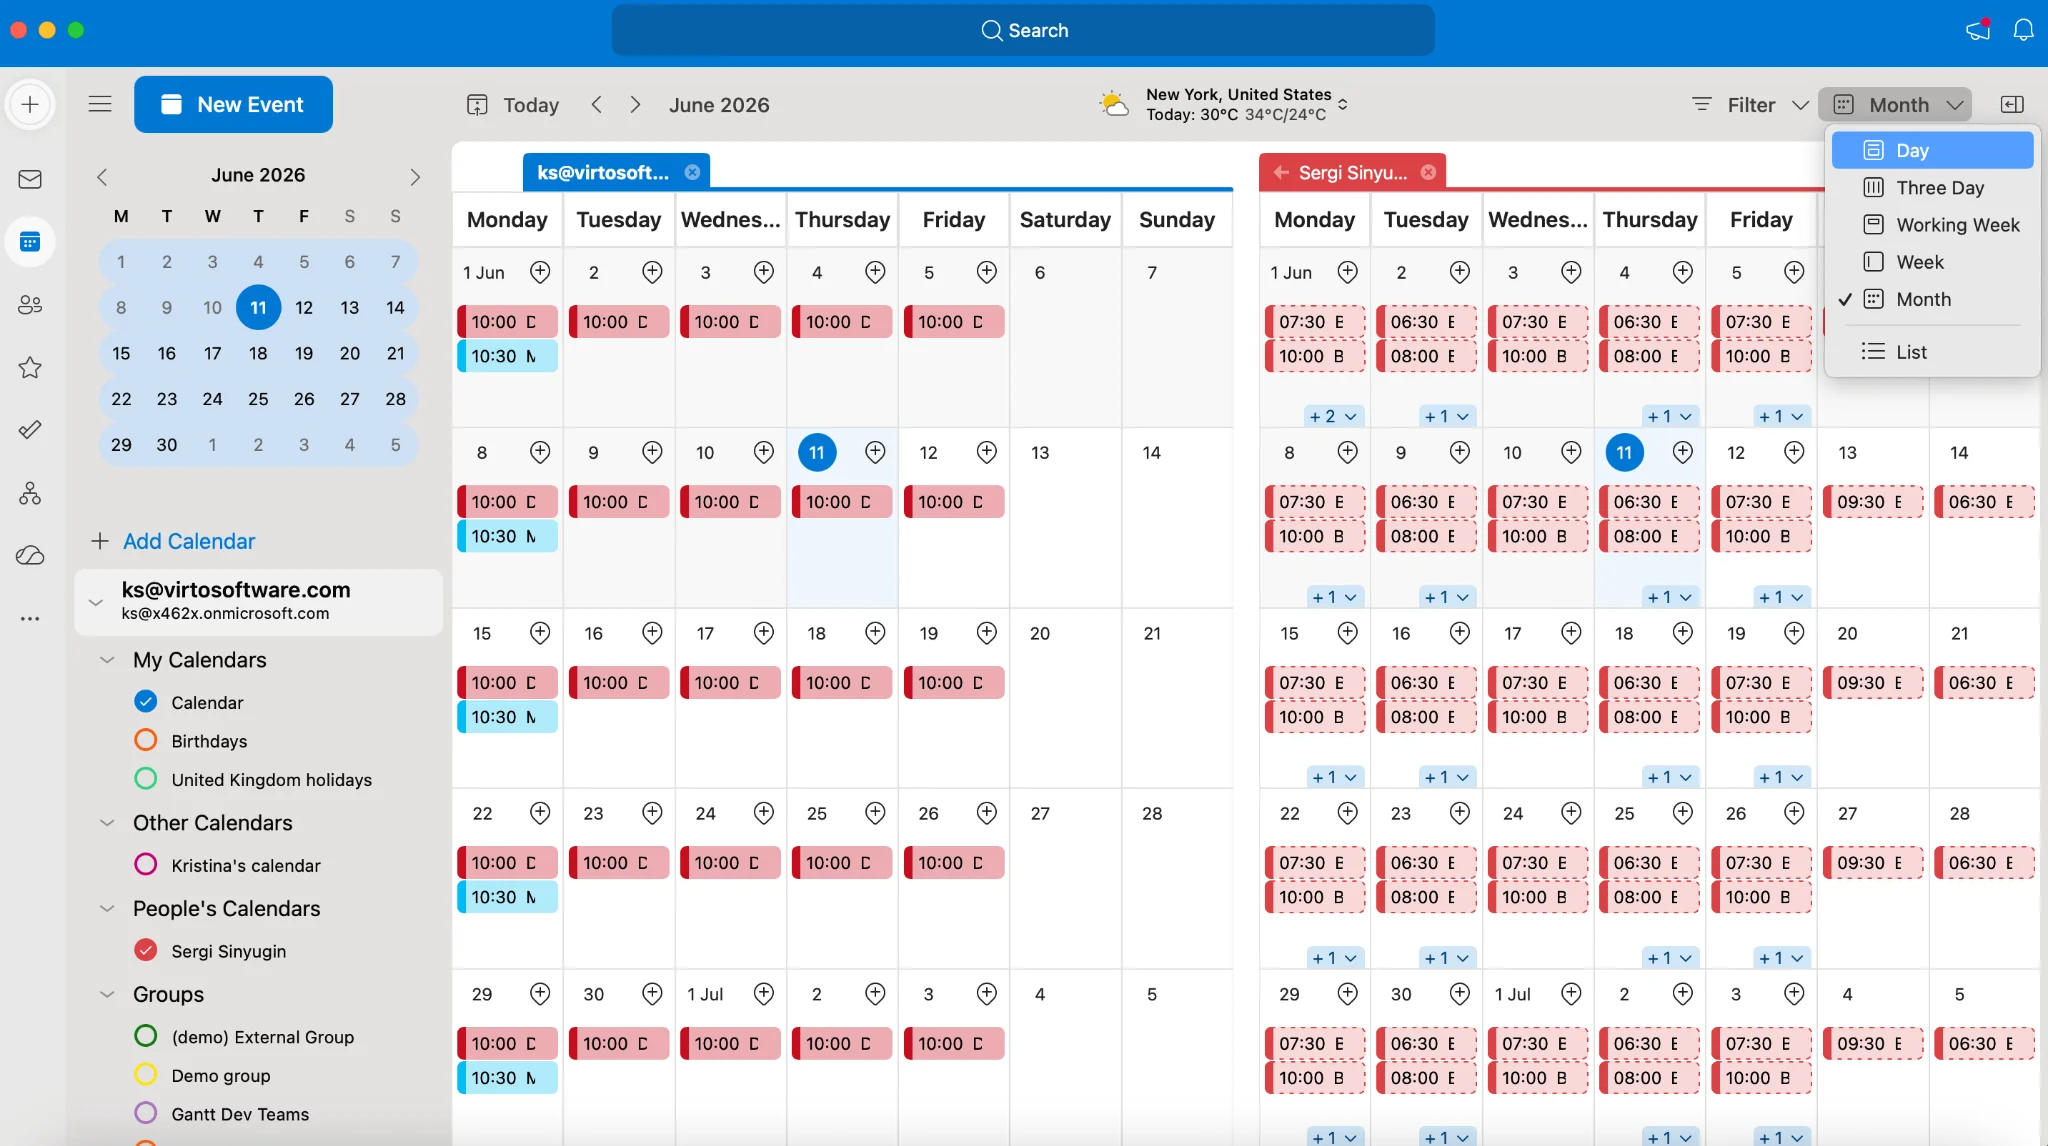
Pic. 1. Navigating to calendar and different views in Outlook for Mac.
- Display multiple calendars: find “My Calendars” in the left sidebar and check the boxes for the calendars you want to view.
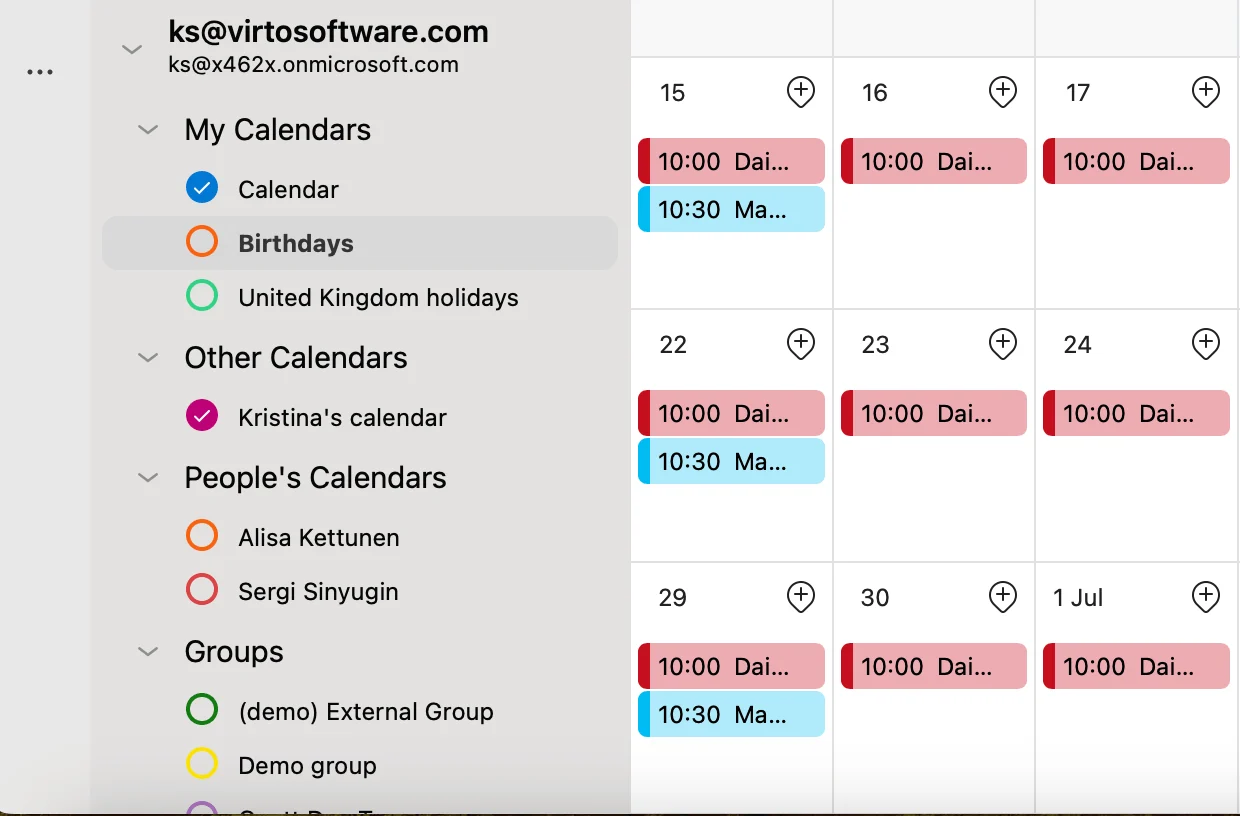
Pic. 2. Selecting calendars you want to view in Outlook for Mac.
- Manage overlay settings: click the three dots “…” next to any calendar to choose colors, display options, and permissions.
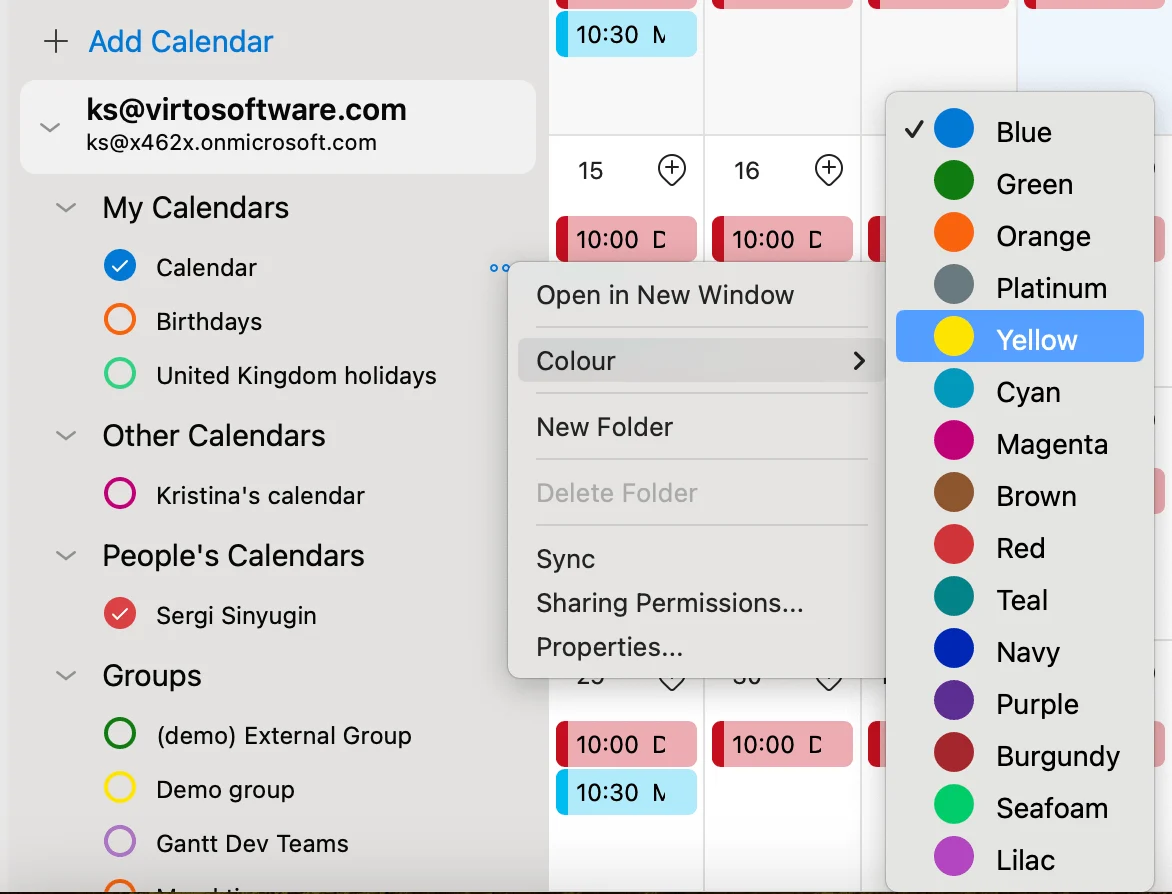
Pic. 3. Choosing colors for your calendars in Outlook for Mac.
- Add calendars for overlay: click the “+” icon next to “My Calendars.”
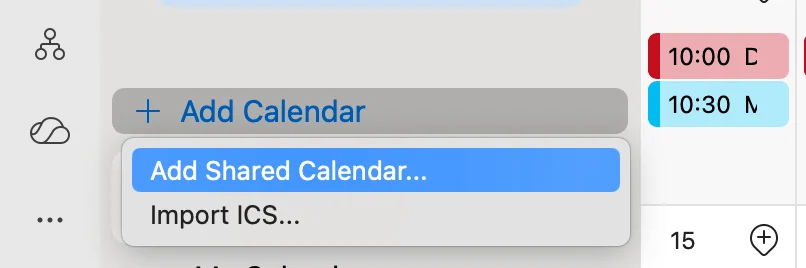
Pic. 4. Adding another calendar in Outlook for Mac.
Select “Add Calendar” from the dropdown, then add a shared calendar or import an ICS file and click “Add” or “Open.”
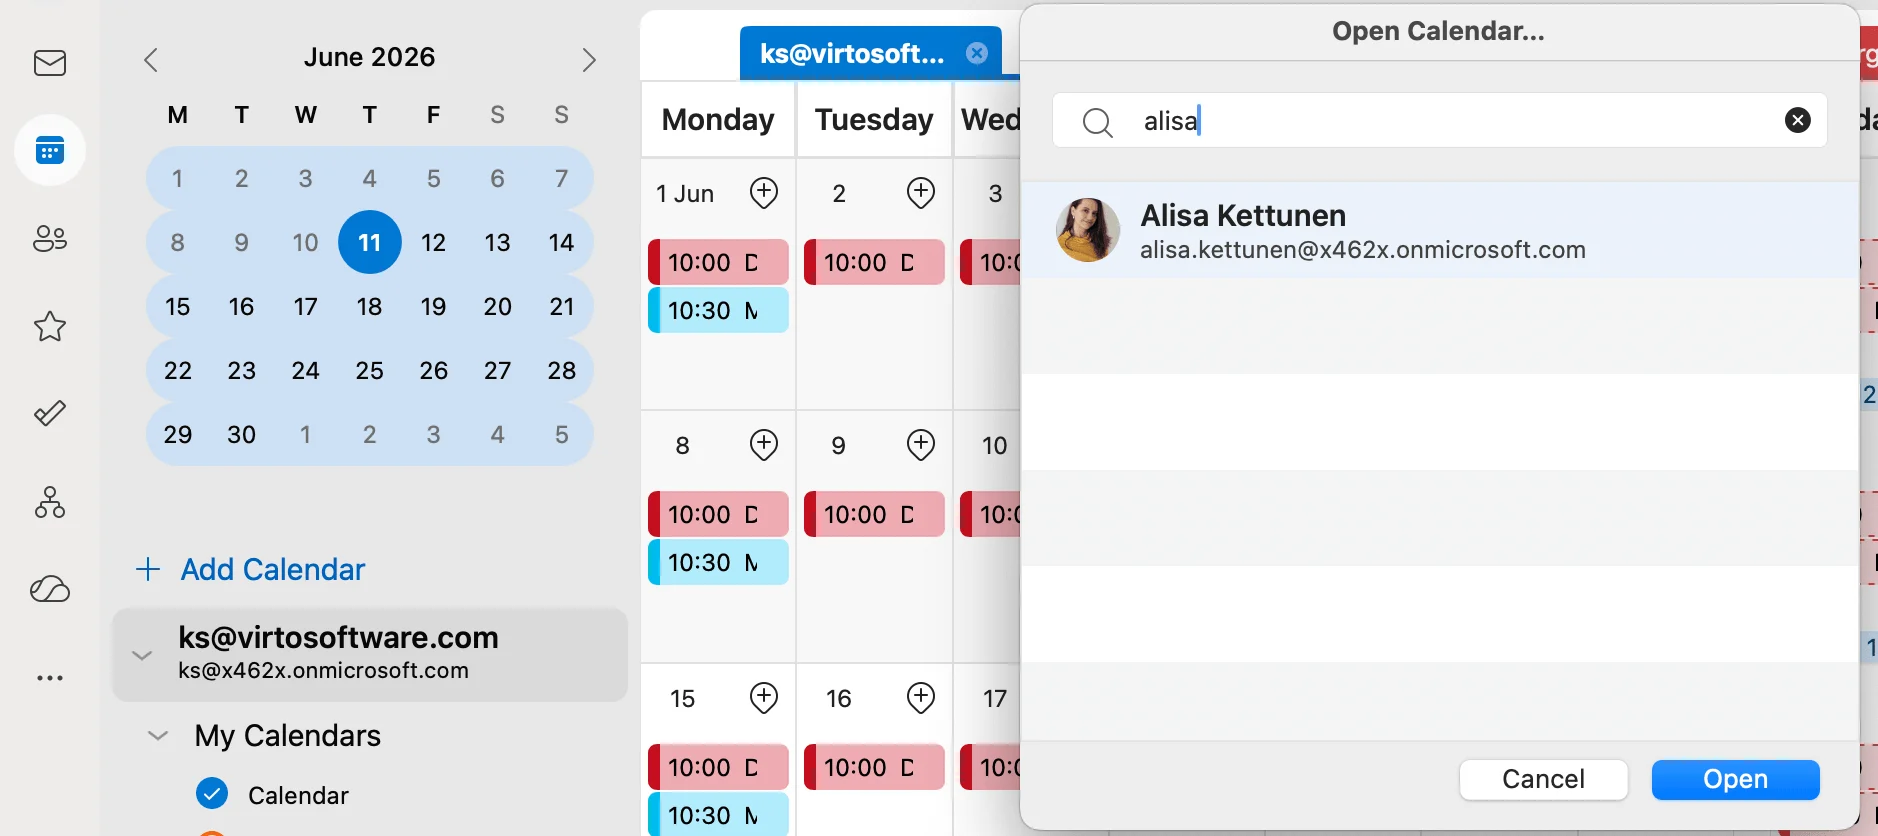
Pic. 5. Looking to add your colleague’s calendar in Outlook for Mac.
You can also create a new calendar: click “Add Calendar+” > “Create New Calendar” or click the three dots near your account and select “New Folder.”
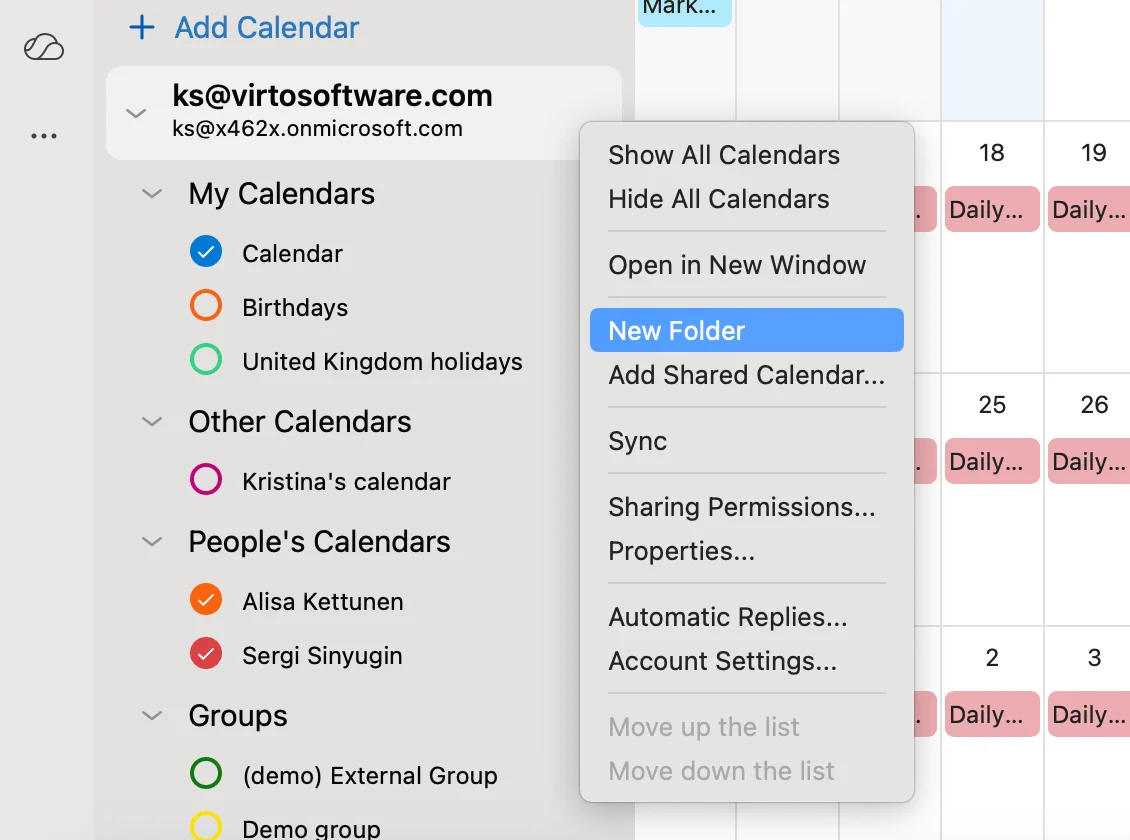
Pic. 6. Creating a new calendar from scratch in Outlook for Mac.
How to overlay calendars in Outlook on the web (OWA)
- Access the Outlook Web App: go to outlook.office.com, sign in, and click the Calendar icon in the navigation bar.
Pic. 7. Navigating to calendar view, adding new calendar, and checking existing calendars in OWA.
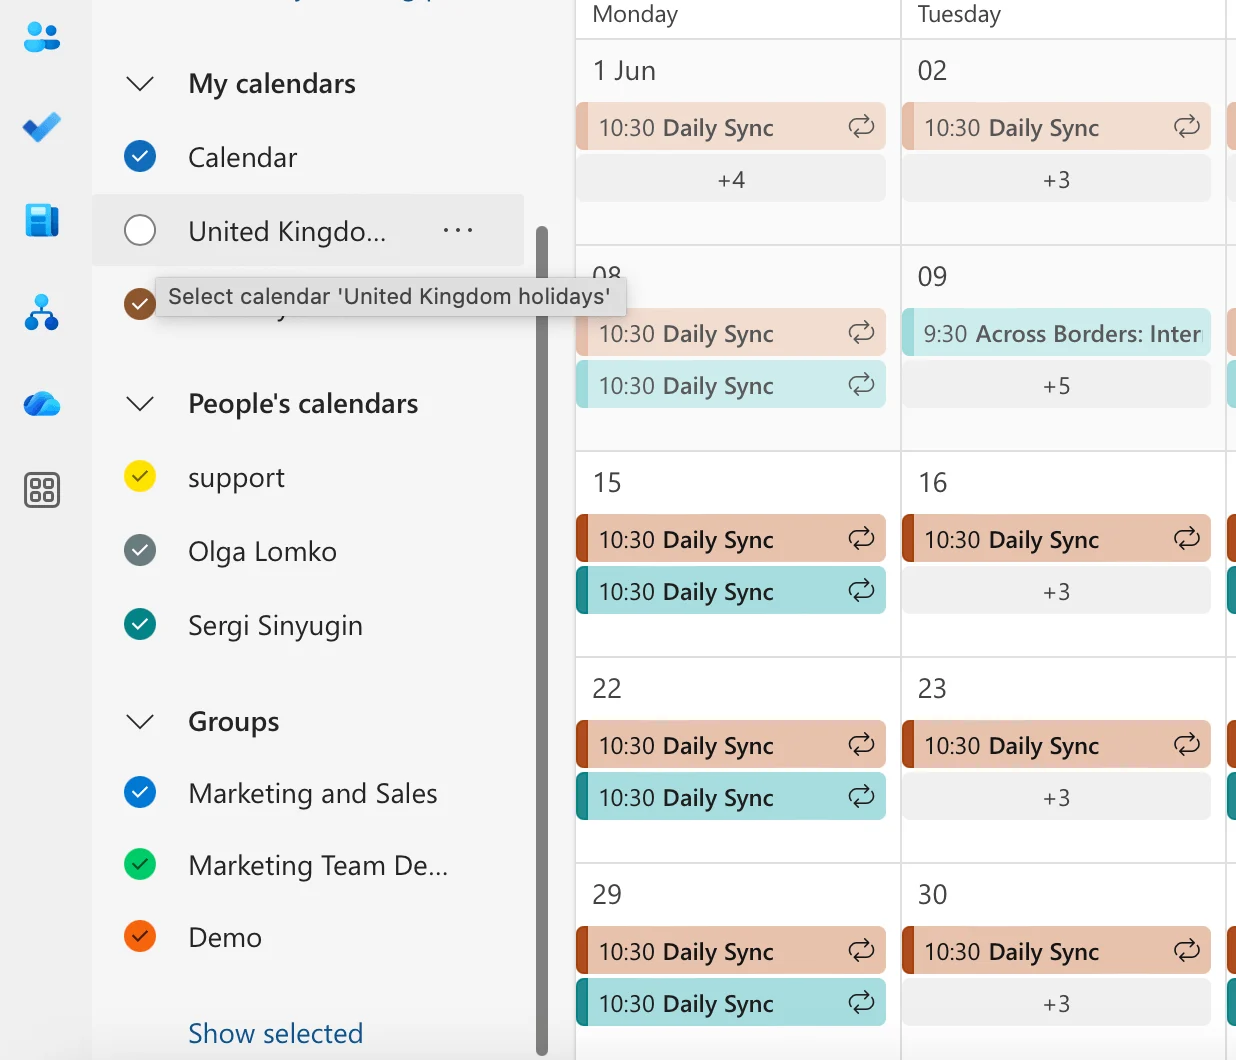
- Select calendars: find the calendar list in the left pane and check the boxes for the calendars you want. Right-click a calendar or use the three dots “…” to set colors and permissions.
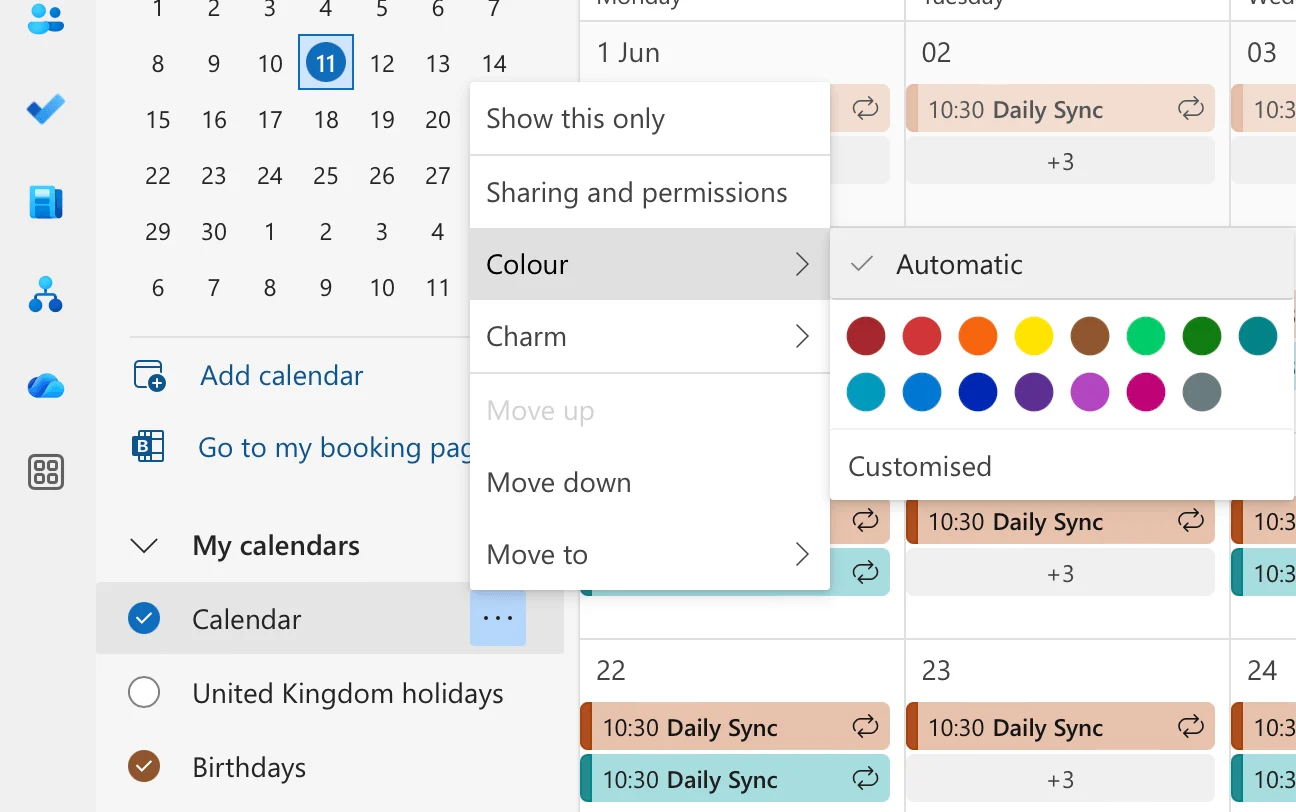
Pic. 8. Selecting colors for your calendars in OWA.
- Add more calendars: click “Add calendar” at the top of the list, choose “From directory,” and search for a colleague or resource. You can also add personal calendars, create a blank calendar, subscribe from the web, or upload from an .ics file.

Pic. 9. Adding calendars in OWA.
How to overlay calendars in Outlook mobile
On iOS and Android, the Outlook mobile app automatically combines your calendars into a unified view.
- Open the Outlook mobile app and tap the Calendar icon at the bottom.
- Tap your profile picture at the top and toggle calendars on or off with the checkboxes. Events display in a combined view automatically.
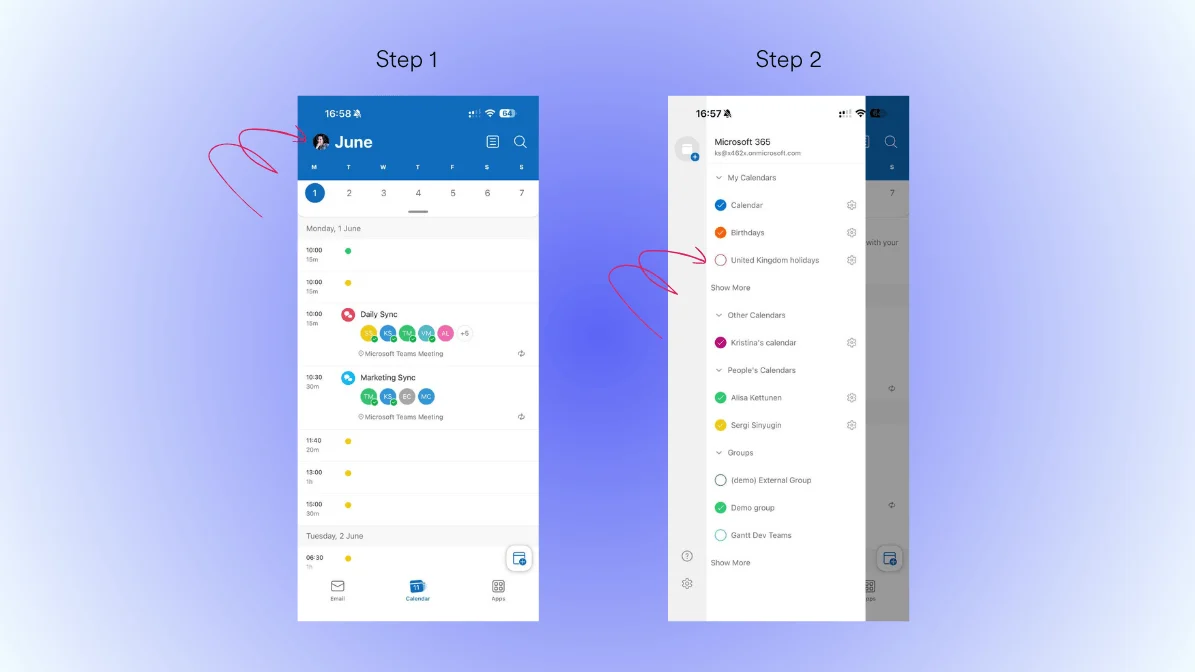
Pic. 10. Viewing calendars in Outlook mobile.
- Customize: tap the settings gear near a calendar to choose colors and sharing preferences.
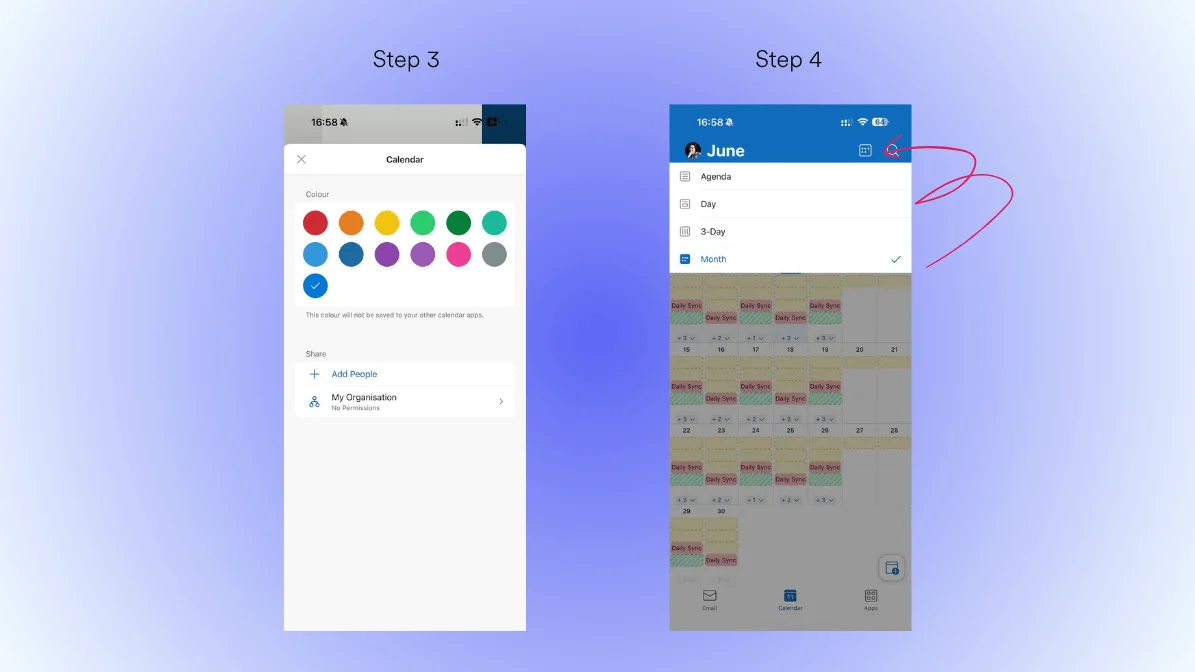
Pic. 11. Selecting colors and views in Outlook mobile.
Merge vs overlay: what’s the difference?
Overlay displays multiple calendars at the same time in one view. Events stay in their original calendars, and the overlay is fully reversible—uncheck a calendar and its events disappear from the combined view. Overlay is for visibility.
Merge permanently moves all events from one calendar into another. The source calendar ends up empty afterward. Merge is for consolidation.
How to merge in Outlook: Outlook has no one-click merge. Export the source calendar as an .ics file, then import it into the target calendar. For a full walkthrough, see our guide on merging calendars in Outlook.
When to use each: overlay when you want to see several calendars together but keep them separate; merge when you want to permanently combine everything into one calendar.
Troubleshooting calendar overlay issues in Outlook
Common issues
- Synchronization challenges: events appearing in one version of Outlook but not another, delayed updates, missing or duplicate appointments, or inconsistent colors—usually caused by network or sync-setting problems.
- Technical limitations: a maximum of 30 calendars can be overlaid at once; shared permissions may expire; large calendars can slow performance; some features differ across Outlook versions.
- Cross-platform complications: settings may not carry between versions, time zones and recurring events can behave differently, and some properties aren’t supported everywhere.
Quick fixes
- Check sync settings: confirm a stable connection, current credentials, frequent sync, and that you’re within storage limits.
- Verify permissions: review access levels, re-accept sharing invitations, and check for expired permissions.
- Fix import problems: confirm the file format (.ics, .vcs), check for corrupt files, and match time zones. If a shared Outlook calendar is not showing, re-accept the share and verify permissions.
- Resolve conflicts: use the Scheduling Assistant, set color categories for overlapping events, and configure double-booking notifications.
Keep your overlay view between sessions
In Classic Outlook for Windows, arrange your calendars, then go to the View tab > View Settings > “Save Current View as a New View,” name it, and check “Make this view the default for this folder.” Outlook for Mac remembers your last-used view automatically. In OWA, view preferences are tied to your Microsoft account and sync across devices.
Overlay unlimited calendars with Virto Calendar
Outlook’s native overlay is capped at Exchange calendars and 30 sources. The Virto Calendar App for Microsoft 365 and Microsoft Teams removes those limits, combining unlimited calendars from many systems into one view—ideal for teams coordinating people, rooms, and external schedules together. It’s also the simplest route to overlay SharePoint calendars alongside Outlook.
- Combine unlimited Microsoft 365 calendars with external calendars, including Google Calendar via iCal.
- Integrate SharePoint lists and Microsoft Planner tasks directly into the calendar view.
- See meeting-room availability alongside personal calendars, with real-time updates and no sync delays.
- Customize color-coding and categories across every source, with flexible day/week/month/year views.
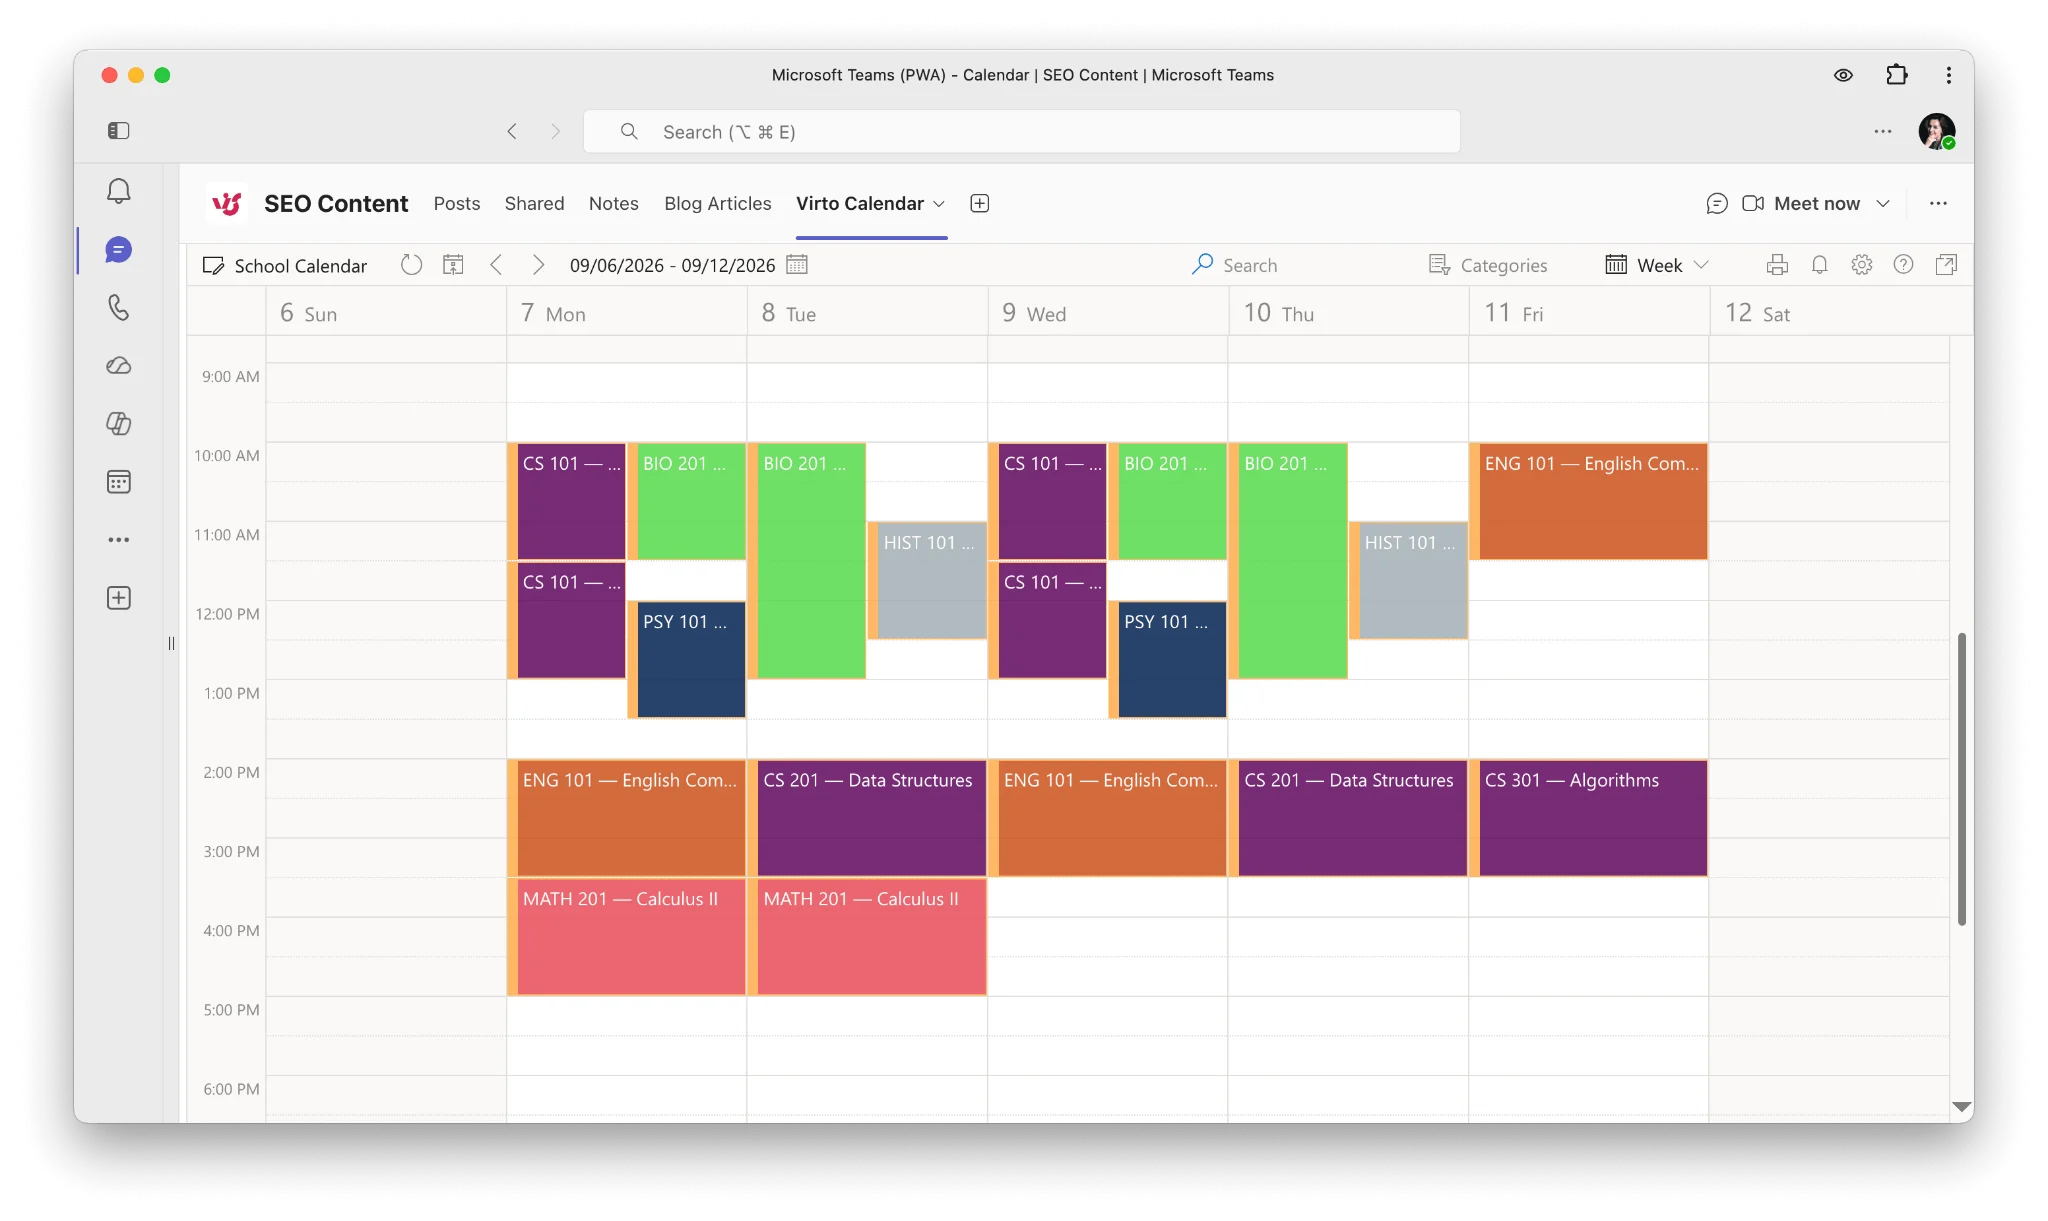
Pic. 12. Sample Virto Calendar overlaid view in Microsoft Teams.
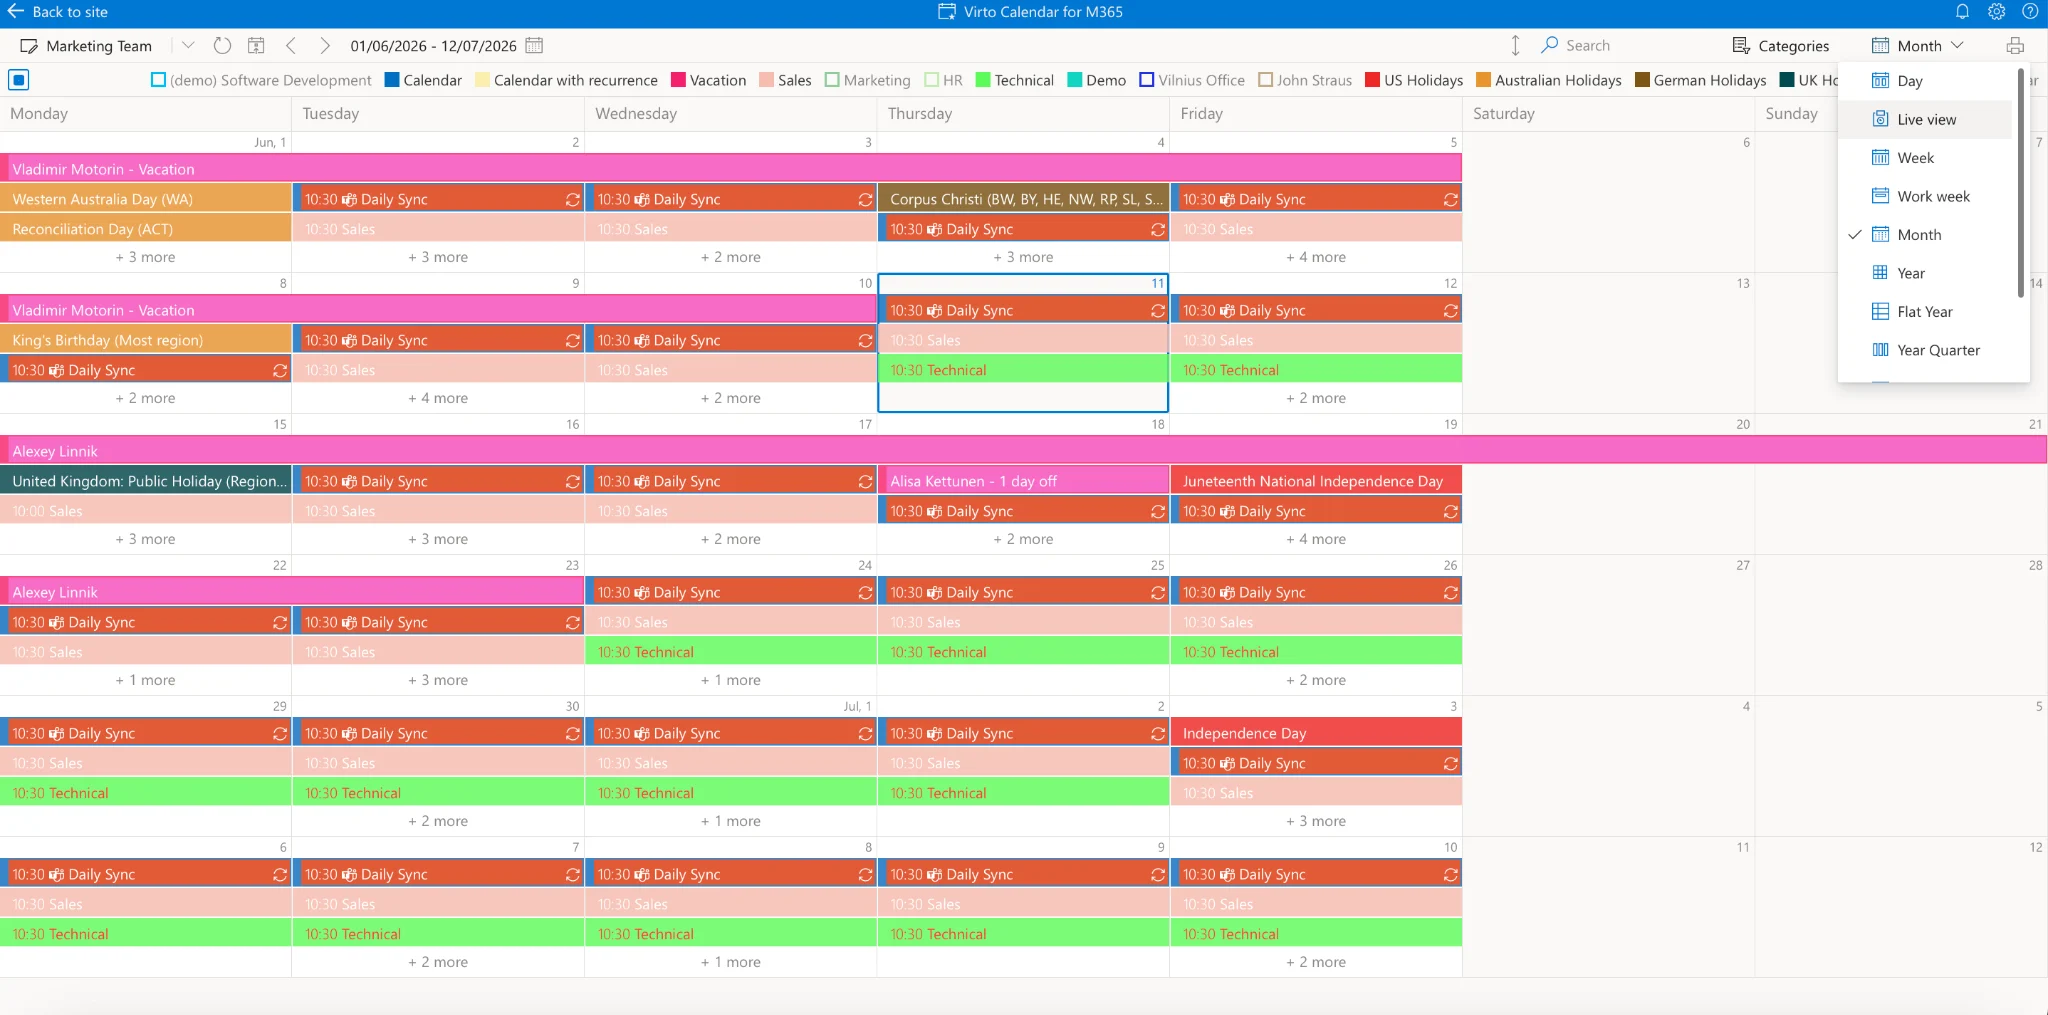
Pic. 13. Different calendar views in Virto Calendar in browser.
| Feature | Virto Calendar App | Default Outlook Overlay |
|---|---|---|
| Calendar sources | Unlimited sources including SharePoint lists, Planner tasks, and external calendars | Limited to Exchange calendars |
| Integration | Full Microsoft 365 ecosystem integration | Limited to Outlook environment |
| Customization | Extensive color-coding and categorization options | Basic color customization |
| Mobile access | Comprehensive mobile support | Limited mobile functionality |
| Security | Enterprise-grade security with granular permissions | Standard Outlook security |
Fig. 1. Virto Calendar vs Outlook.
FAQ
How do I overlay calendars in New Outlook?
Open the Calendar, then tick the checkbox next to each calendar in the left pane. New Outlook overlays checked calendars automatically—there’s no arrow toggle. Right-click a calendar to change its color.
What’s the difference between overlay and merge in Outlook?
Overlay shows multiple calendars together while keeping their events separate and reversible; merge permanently combines events from one calendar into another. See the Merge vs overlay section above for details.
Can I overlay more than 2 calendars in Outlook?
Yes. Outlook supports overlaying up to 30 calendars at once. Beyond that, performance can suffer—Virto Calendar removes the limit entirely.
How do I keep the calendar overlay view in Outlook?
In Classic Outlook for Windows, use View > View Settings > “Save Current View as a New View” and set it as the default for the folder. Mac remembers your last view automatically, and OWA syncs preferences to your Microsoft account.
Can I overlay Google Calendar with Outlook?
Yes—subscribe to your Google Calendar’s iCal link in Outlook to view it as an overlay. For full two-way overlay with other sources, Virto Calendar connects Google Calendar via iCal alongside Microsoft 365 calendars.
Conclusion
Outlook’s native overlay covers everyday needs across Classic Outlook, New Outlook, Mac, OWA, and mobile. When you need unlimited sources, SharePoint and Planner integration, or real-time team coordination, the Virto Calendar App goes further. Either way, the goal is the same: one clear, reliable view of every schedule that matters.
