Outlook runs a large share of professional schedules — but that convenience can quietly expose confidential information. This guide shows you how to make your Outlook calendar private in 2026: the fastest way to hide event details, mark meetings as private, and control exactly who sees what. We start with a quick, step-by-step answer, then walk through every privacy setting in Outlook on the web and Outlook desktop, and finish with Virto Calendar App’s enhanced privacy and permission controls for Microsoft 365.
Quick answer: how to make your Outlook calendar private
To make your Outlook calendar private and hide event details from others, follow these steps:
- Right-click your calendar in the left sidebar and select Sharing and permissions (Outlook on the web) or Properties (Outlook desktop).
- Select the Default user (the setting that applies to everyone who isn’t listed individually).
- Set the permission level to Can view when I’m busy / Availability only — or Not shared / None to hide the calendar entirely.
- Click Save (web) or Apply → OK (desktop).
- To hide a single event, open it and toggle the Private (padlock) flag so others see only that you’re busy.
That’s it — others can see when you’re busy, but the titles, locations, and notes of your events stay hidden.
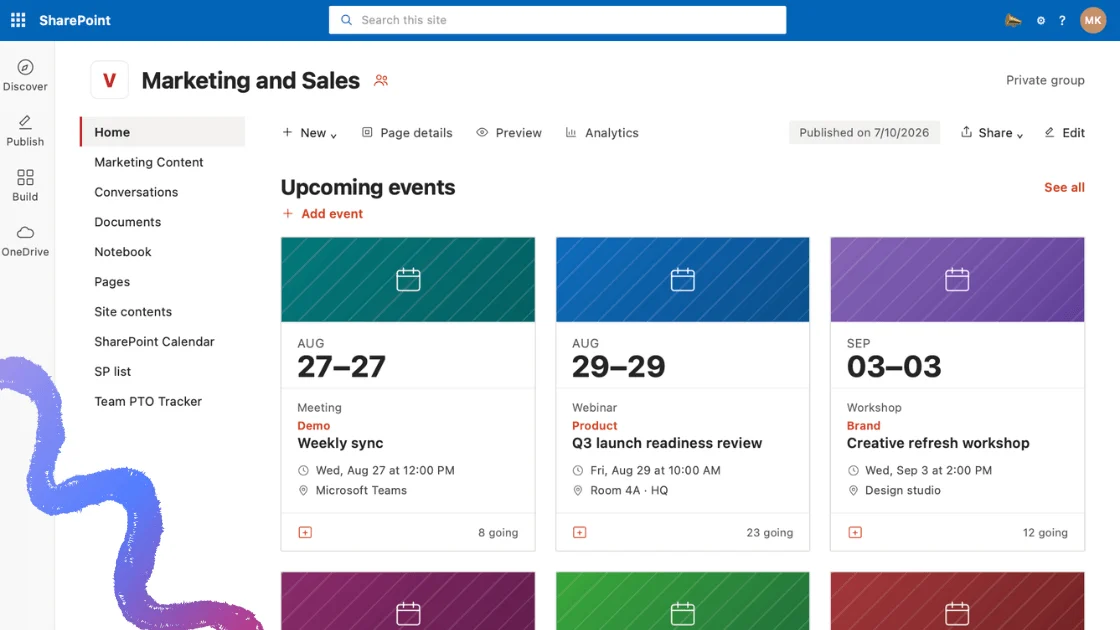
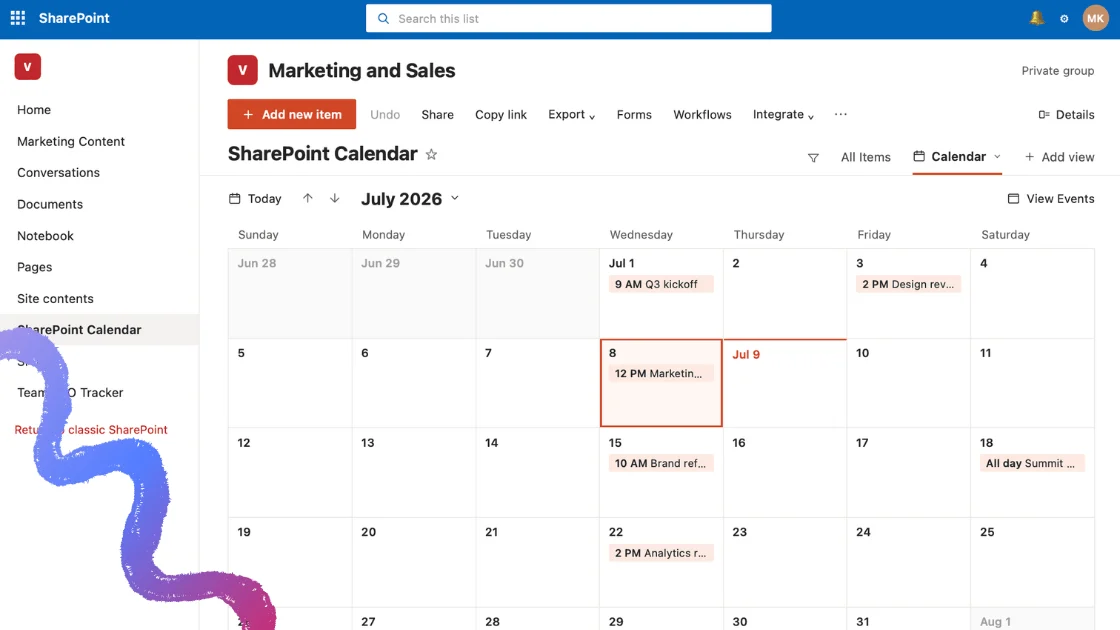
Next question: how does the team still plan around you? With details hidden, colleagues see only that you are busy. Dates a team does need to share, such as vacations, on-call shifts and project deadlines, belong in a team calendar that you can overlay with Outlook, SharePoint and Planner calendars in one color-coded view using Virto Calendar App.
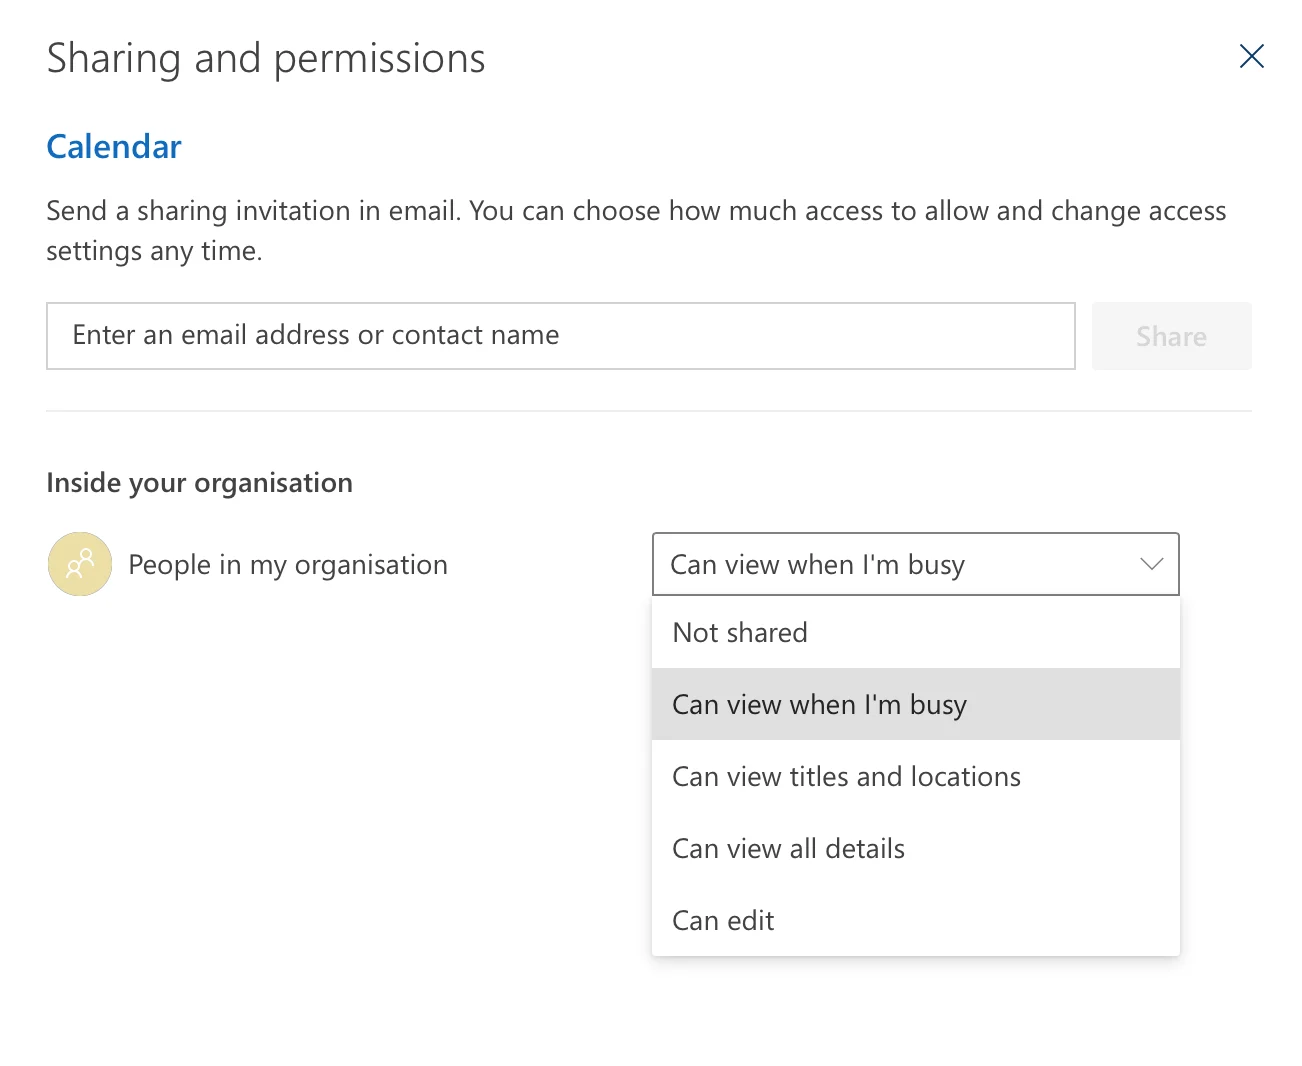
Pic.1. Setting the calendar’s Default permission to “Can view when I’m busy” to keep event details private.
Why Calendar Privacy Matters
- Unauthorized access: competitors or bad actors gaining insight into business strategy or personal data.
- Social engineering: attackers using knowledge of your meetings to craft convincing phishing messages.
- Compliance exposure: regulations such as HIPAA require strict control over sensitive appointment data.
Outlook Calendar Privacy Settings Explained
Permission levels at a glance
- Availability only / Can view when I’m busy: others see free/busy blocks but no details — the recommended privacy default.
- Limited details: others see subjects and locations only.
- Full details / Can view all details: others see everything — use only for trusted delegates.
- Not shared / None: the calendar is hidden entirely from that person or group.
Finding your permission settings
- Open Outlook (desktop or web) and go to the Calendar view.
- Right-click your calendar in the left sidebar (or click …) and choose Sharing and permissions / Properties.
- Review the list of users and their access levels, then adjust as needed.
Pic.2. Navigating to your calendar’s sharing and permission settings.
👉 Can others see my Outlook calendar details? By default, people in your organization usually see only your free/busy availability. If you’ve shared your calendar, they see as much as the permission level allows. To tighten this, lower the Default permission or mark individual events as Private.
Make a Single Event — or All Meetings — Private
Mark one event private
Outlook desktop
- Open (or create) the appointment or meeting.
- On the ribbon, in the Tags group, click the Private icon (padlock).
- Click Save & Close.
Outlook on the web
- Create a new event or open an existing one.
- Click the Private toggle / padlock near the top of the event window.
- Click Save (or Send for a meeting invite).
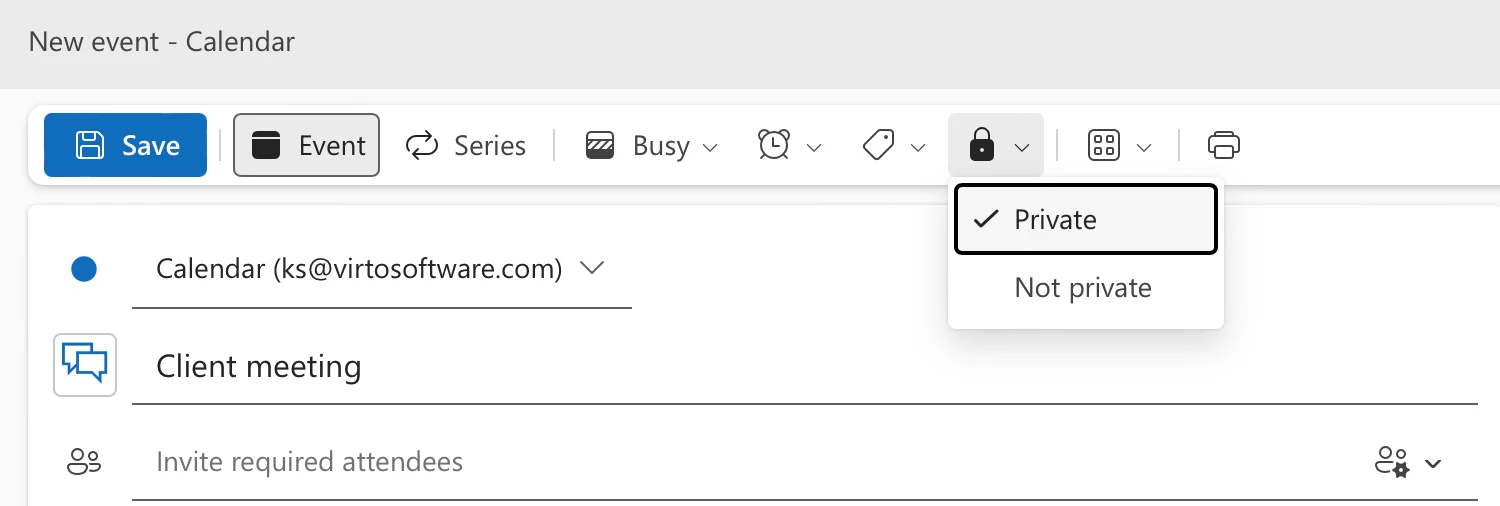
Pic.3. Marking an event as Private in Outlook on the web.
Set all new meetings to private by default (desktop VBA)
Outlook doesn’t offer a built-in switch to make every meeting private, but in Outlook desktop you can automate it with a short VBA macro. Press Alt + F11 to open the VBA editor, go to Insert → Module, and paste:
Private Sub Application_ItemSend(ByVal Item As Object, Cancel As Boolean)
    If TypeOf Item Is MeetingItem Then
        Item.Sensitivity = olPrivate
    End If
End Sub
Save and close the editor. Note: Outlook on the web has no default-private option — you’ll need to mark each event manually there.
👉 How do I make all my appointments private in Outlook? Mark each appointment via the Private flag in the Tags group, or use the VBA macro above to set new items private automatically in Outlook desktop. On the web, mark each event manually.
Hide Calendar Details When Sharing
Outlook desktop
- Right-click your calendar and select Share Calendar.
- Enter the email addresses of the people you want to share with.
- Under Details, select Availability only.
- Click Send.
Outlook on the web
- Open your calendar and click Share (or the three-dot menu next to the calendar).
- Enter the recipients’ email addresses.
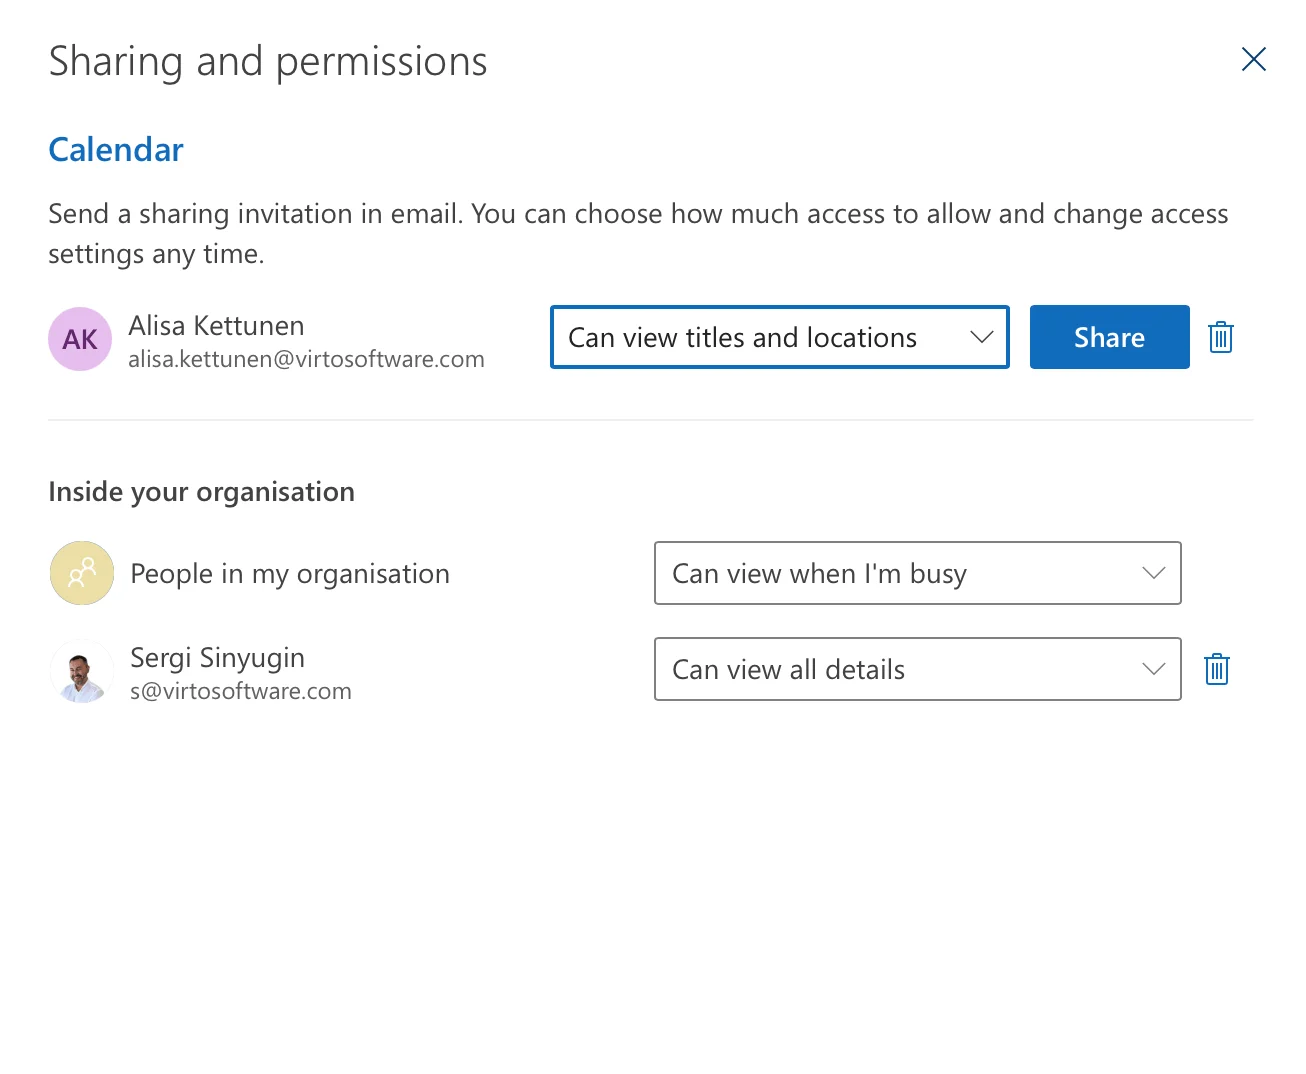
- Set their access level to Can view when I’m busy.
- Click Share.
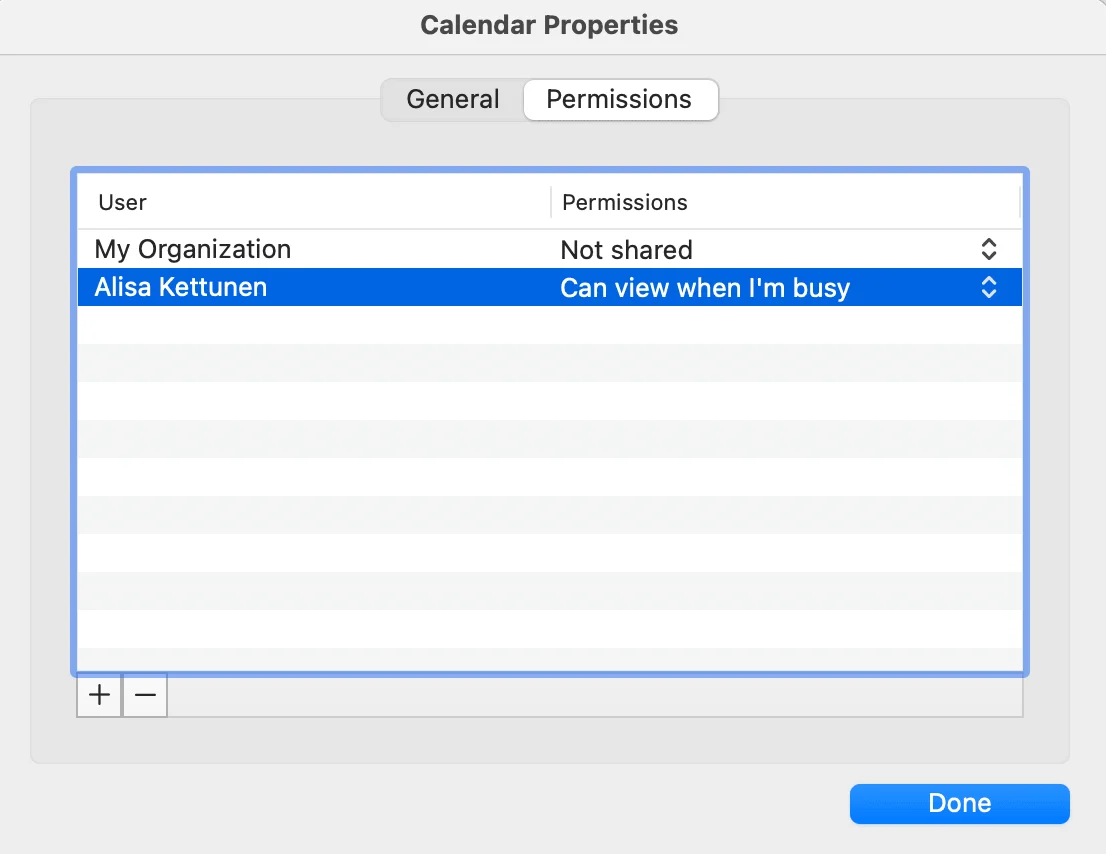
Pic.4. Sharing a calendar with “Can view when I’m busy” permissions.
👉 How do I hide meeting details in Outlook? Set the event to Private, or share your calendar with “Availability only” / limited-details permissions so titles and locations stay hidden while your busy times remain visible.
Organize privacy with categories
Categories help you group and filter events, and pair naturally with the Private flag. Open an event, click Categorize (desktop) or open the categories section (web), assign a category, and optionally mark it Private. You can then filter your calendar view to show or hide certain categories — handy when presenting your schedule or sharing selectively. For more on this, see our guide to color-coding your calendar.
Make Sure Your Calendar Is Private: A Quick Checklist
- Default permission is set to Availability only / Can view when I’m busy — or None / Not shared.
- Sensitive events are individually marked Private.
- Shared-with list contains only people who genuinely need access, each at the lowest necessary level.
- New meetings default to Private (via VBA) if you’re on desktop.
- Team communication: colleagues know how to reach you for scheduling even though details are hidden.
👉 How do I make sure my Outlook calendar is private? Check the Default permission level in Sharing and permissions, mark sensitive events as Private, and confirm your shared-with list only includes people who need access.
Easier Privacy Control with Virto Calendar App
Native Outlook settings cover the basics, but managing privacy across many shared calendars quickly becomes tedious. Virto Calendar App is an enterprise-grade overlay for Microsoft 365 and SharePoint Online that consolidates calendars from Exchange Online, Microsoft 365, SharePoint, and Microsoft Teams into one color-coded view — with far more granular privacy and permission controls than Outlook alone.
Privacy features that go beyond native Outlook
- Granular access controls: decide precisely who can view, add, edit, or delete events.
- Flexible visibility settings: control what’s shared and with whom, per event or per calendar.
- Role-based permissions: roles like calendar manager and license manager ensure only authorized users make changes.
- Private event marking: hide details from everyone except the owner or designated viewers.
How permissions work
Virto Calendar inherits permissions from your SharePoint site, so access stays consistent with your existing setup. You manage this on two levels — SharePoint list permissions and in-app Virto Calendar roles.
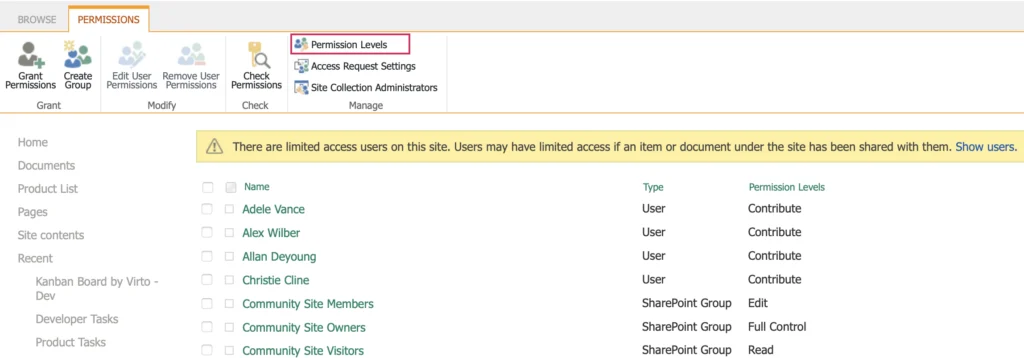
Pic.5. Adjusting SharePoint list permissions that Virto Calendar inherits.
👉 For details, see the Knowledge Center guides: First level: SharePoint Permissions Settings and Second level: Virto Calendar Permissions Settings.
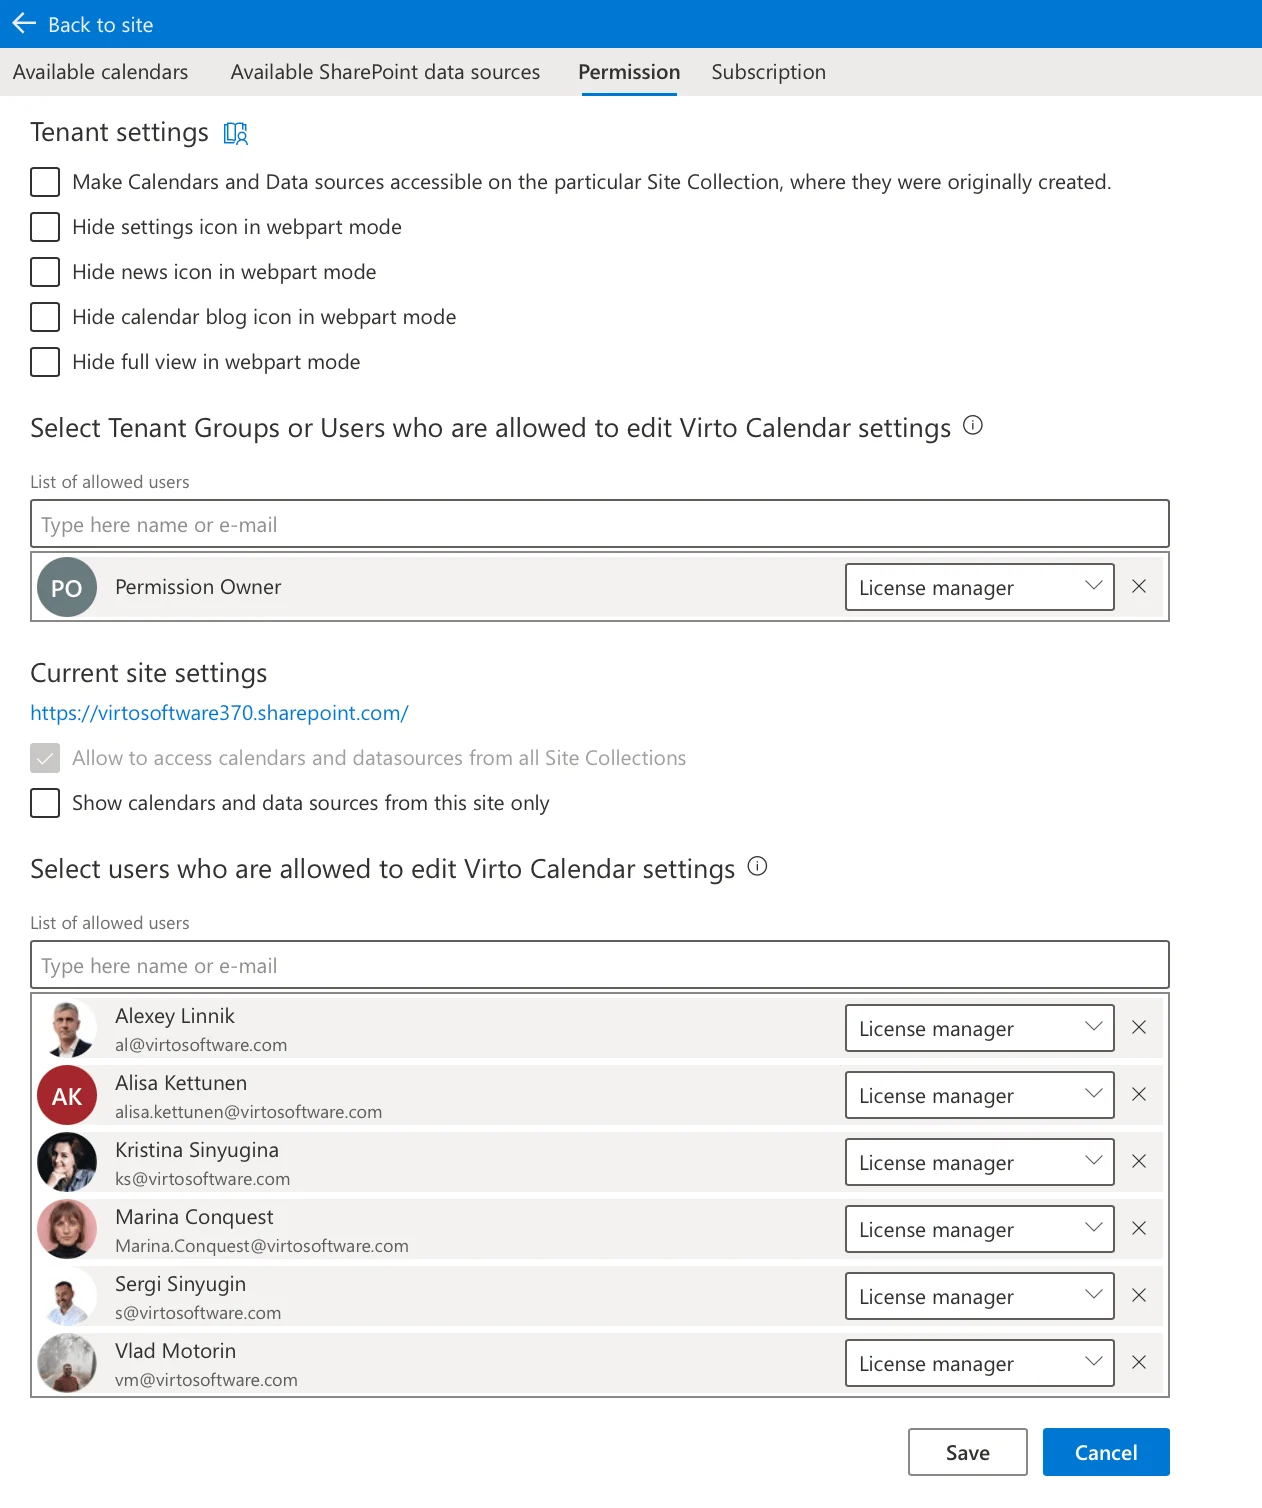
Pic.6. Assigning Virto Calendar roles under the calendar’s Permissions settings.
Because Virto Calendar integrates with SharePoint’s security infrastructure, it adds role-based permissions, selective visibility, audit trails, and self-hosted deployment in your own Azure — keeping data entirely within your infrastructure for compliance.
You can try Virto Calendar App free for 30 days or request a demo to see the privacy controls in action.
FAQ
How do I make my Outlook calendar private?
Right-click your calendar, open Sharing and permissions (web) or Properties (desktop), set the Default permission to “Availability only” / “Can view when I’m busy,” and mark sensitive events as Private. Others will see your busy times but not the details.
How do I hide meeting details in Outlook?
Open the event and enable the Private (padlock) flag, or share your calendar with “Availability only” permissions so titles and locations stay hidden.
How do I make all events private in Outlook?
Mark each event with the Private flag, or in Outlook desktop use a short VBA macro to set new meetings private by default. Outlook on the web requires marking each event manually.
Can others see my Outlook calendar details?
Only as much as your permission levels allow. By default most organizations show free/busy availability only; adjust the Default permission or mark events Private to hide more.
Related Guides
- How to Share a Calendar in Outlook
- Outlook Out-of-Office Calendar Guide
- Fixing Outlook Calendar Not Syncing
- How to Create an Office 365 Shared Calendar
- Guide to Microsoft Teams Security & Data Privacy
- SharePoint Permissions Guide: Best Practices and Management
- Calendar Management: Best Practices & Tips
- Crafting Corporate Event Calendars: Theory to Action
References
- Statistics from ECAL.